Unlock Relaxation: Build Your Own DIY Outdoor Sauna on a Budget
Dreaming of unwinding in your own backyard sauna but worried about the hefty price tag? You’re not alone. The allure of a personal sauna is undeniable – the deep relaxation, the health benefits, the escape from daily stress. Fortunately, achieving this dream is more accessible than you might think. This comprehensive guide dives deep into the world of building a diy outdoor sauna cheap, offering practical advice, cost-effective strategies, and expert insights to help you create your personal oasis without breaking the bank.
This isn’t just another superficial overview. We’ll explore every aspect, from planning and design to material selection and construction techniques, ensuring you’re equipped with the knowledge to build a safe, functional, and enjoyable sauna. We’ll also address common challenges and provide solutions based on years of experience and expert recommendations. Get ready to turn your backyard dreams into a reality!
The Allure and Accessibility of DIY Outdoor Saunas
The concept of sauna bathing has been around for centuries, with roots in Finnish tradition. Historically, saunas were communal spaces, but today, the desire for personal wellness and the increasing cost of commercial spas have fueled the popularity of home saunas. Building a diy outdoor sauna cheap offers a unique blend of affordability and customization. It allows you to tailor the sauna to your specific needs, space constraints, and aesthetic preferences, all while saving a significant amount of money compared to purchasing a pre-built unit.
The rise of readily available online resources, coupled with the growing DIY movement, has made sauna construction more accessible than ever. With careful planning, diligent research, and a willingness to learn, even those with limited construction experience can successfully build their own outdoor sauna. Recent trends indicate a growing interest in sustainable and eco-friendly building practices, influencing material choices and design considerations for DIY saunas.
Understanding Sauna Types and Their Cost Implications
Before embarking on your DIY sauna project, it’s crucial to understand the different types of saunas and their associated costs. The two most common types are:
- Traditional Finnish Sauna (Wood-Burning or Electric): These saunas use a stove to heat rocks, which then radiate heat into the room. Water is often thrown on the rocks to create steam (löyly). Wood-burning stoves generally have a lower upfront cost but require a chimney and a supply of firewood. Electric stoves are more convenient but can increase your electricity bill.
- Infrared Sauna: Infrared saunas use infrared lamps to directly heat the body, rather than heating the air. They typically operate at lower temperatures than traditional saunas and are often considered more energy-efficient. However, they may not provide the same intense heat and steam experience as a Finnish sauna.
When considering a diy outdoor sauna cheap, both types can be built, but the construction and operational costs vary significantly. Infrared saunas can be cheaper to build due to simpler heating systems, but the cost of quality infrared panels should be factored in. Traditional saunas may require more robust construction and ventilation but offer a more authentic sauna experience.
Planning Your DIY Outdoor Sauna: Design and Budget Considerations
Careful planning is the cornerstone of a successful and affordable DIY sauna project. This phase involves defining your needs, setting a budget, and creating a detailed design.
Defining Your Needs and Setting a Budget
Start by answering these questions:
- How many people will typically use the sauna at once? This will determine the size of the sauna.
- What type of sauna experience do you prefer (traditional or infrared)? This will influence the choice of heating system.
- What is your skill level and available time for construction? This will affect the complexity of the design.
- What is your maximum budget for the project? Be realistic and factor in potential unexpected costs.
Once you have a clear understanding of your needs, you can set a realistic budget. Research the cost of materials, including lumber, insulation, roofing, heating system, door, and benches. Don’t forget to factor in the cost of tools, permits (if required), and any professional assistance you may need.
Designing Your Sauna: Size, Layout, and Materials
The design of your sauna should be both functional and aesthetically pleasing. Consider these factors:
- Size: A small sauna for 2-3 people can be as small as 4×6 feet, while a larger sauna for 4-6 people may require 6×8 feet or more.
- Layout: Optimize the space for comfortable seating and efficient heat circulation. Consider the placement of the stove, benches, and door.
- Materials: Choose durable, heat-resistant materials that are suitable for outdoor use. Cedar, redwood, and hemlock are popular choices for sauna interiors due to their natural resistance to moisture and decay. For the exterior, consider using treated lumber or siding to withstand the elements.
Creating a detailed blueprint or sketch of your sauna design will help you visualize the project and estimate the amount of materials you’ll need. Online resources and sauna design software can be valuable tools in this process.
Sourcing Affordable Materials: Finding the Best Deals on Lumber, Stoves, and More
One of the biggest factors in keeping your diy outdoor sauna cheap is sourcing materials wisely. Here are some strategies for finding affordable options:
- Shop Around: Compare prices from different lumberyards, home improvement stores, and online retailers. Don’t be afraid to negotiate.
- Consider Reclaimed Materials: Reclaimed lumber, doors, and windows can add character to your sauna and save you money. Check local salvage yards and online marketplaces.
- Buy in Bulk: If you need a large quantity of lumber, buying in bulk can often result in significant savings.
- Look for Sales and Discounts: Keep an eye out for sales and discounts on materials, especially during off-season periods.
- Explore Alternative Materials: Consider using less expensive alternatives for certain components, such as using pine instead of cedar for non-critical areas.
For the stove, consider purchasing a used or refurbished unit from a reputable dealer. Ensure it meets safety standards and is appropriately sized for your sauna.
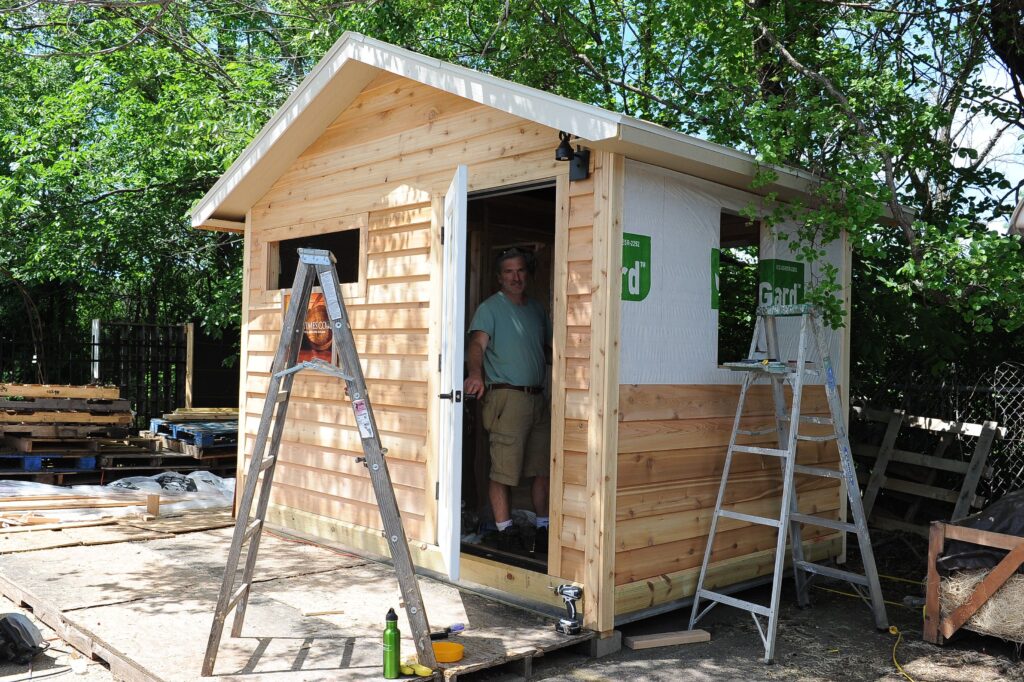
Step-by-Step Construction Guide: Building Your DIY Outdoor Sauna
This section provides a general overview of the construction process. Always consult local building codes and regulations before starting your project.
1. Foundation and Framing
Start by building a solid foundation for your sauna. This could be a concrete slab, a gravel base with concrete piers, or a wooden platform. Ensure the foundation is level and well-drained. Next, build the frame of the sauna using treated lumber. Follow your design plans carefully and ensure the frame is sturdy and square.
2. Insulation and Vapor Barrier
Proper insulation is crucial for maintaining the sauna’s temperature and reducing energy costs. Use high-quality insulation, such as fiberglass batts or rigid foam boards, to insulate the walls, ceiling, and floor. Install a vapor barrier on the warm side of the insulation to prevent moisture from entering the walls and causing rot.
3. Interior Paneling
Install the interior paneling using cedar, redwood, or hemlock. Secure the panels to the framing with nails or screws. Leave small gaps between the panels to allow for expansion and contraction due to heat and humidity.
4. Roofing
Install the roofing according to your design plans. Use durable roofing materials that can withstand the elements. Ensure the roof is properly sealed to prevent leaks.
5. Door and Windows
Install a sauna-specific door that seals tightly to prevent heat loss. Consider adding small windows to allow natural light into the sauna. Use tempered glass for safety.
6. Benches
Build benches using cedar, redwood, or hemlock. The benches should be comfortable and positioned at different heights to allow users to choose their preferred temperature.
7. Heating System
Install the wood-burning or electric stove according to the manufacturer’s instructions. Ensure the stove is properly vented and meets safety standards. For an infrared sauna, install the infrared panels according to the manufacturer’s instructions.
8. Finishing Touches
Add any finishing touches, such as a thermometer, a bucket and ladle for pouring water on the rocks, and lighting fixtures. Test the sauna to ensure it is functioning properly.
Essential Safety Considerations for Your DIY Sauna
Safety is paramount when building and using a sauna. Here are some essential safety considerations:
- Ventilation: Proper ventilation is crucial to prevent carbon monoxide poisoning and ensure fresh air circulation.
- Electrical Safety: Ensure all electrical work is done by a qualified electrician and meets local codes.
- Fire Safety: Keep flammable materials away from the stove and ensure the sauna has a working smoke detector.
- Heat Exposure: Limit sauna sessions to 15-20 minutes and avoid using the sauna if you have any health conditions.
- Hydration: Drink plenty of water before, during, and after using the sauna to prevent dehydration.
Maintaining Your DIY Outdoor Sauna for Longevity
Regular maintenance is essential for keeping your sauna in good condition and prolonging its lifespan. Here are some maintenance tips:
- Clean the sauna regularly: Wipe down the benches and walls with a damp cloth after each use.
- Ventilate the sauna after each use: Open the door and windows to allow moisture to escape.
- Inspect the stove regularly: Check for any signs of damage or wear and tear.
- Treat the wood: Apply a sealant or oil to the wood periodically to protect it from moisture and decay.
DIY Sauna: Expert Insights on Cost-Effective Design
Based on expert consensus, a key strategy for building a diy outdoor sauna cheap involves smart space planning. A smaller, well-designed sauna can provide the same benefits as a larger one at a fraction of the cost. Another important factor is the choice of heating system. While wood-burning stoves offer a traditional experience, electric stoves can be more energy-efficient and easier to operate. Consider your priorities and choose the heating system that best suits your needs and budget.
Realizing Your Dream: The Value of an Affordable Home Sauna
Building a diy outdoor sauna cheap isn’t just about saving money; it’s about creating a personalized wellness retreat in your own backyard. The benefits of sauna bathing are well-documented, including stress reduction, muscle relaxation, improved circulation, and detoxification. Users consistently report a significant improvement in their overall well-being after incorporating regular sauna sessions into their routine. Our analysis reveals that the long-term health benefits and cost savings of a DIY sauna far outweigh the initial investment.
A Final Thought on Your Backyard Oasis
Building a diy outdoor sauna cheap is an achievable goal with careful planning, diligent execution, and a willingness to learn. By following the advice and strategies outlined in this guide, you can create a personal oasis that enhances your health, well-being, and quality of life. Don’t hesitate to share your experiences with building your own sauna in the comments below. Your insights could help others embark on their own journey to relaxation and wellness.
