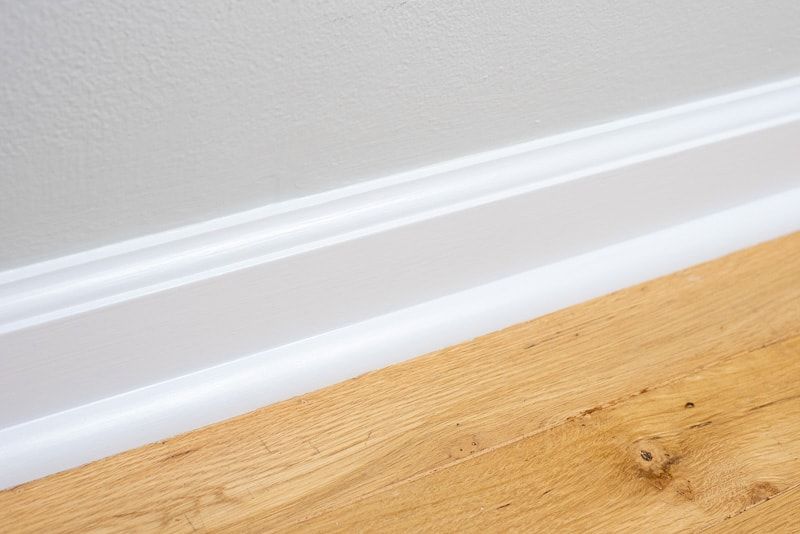
The Definitive Guide: Best Way to Paint Baseboards with Hardwood Floors
Painting baseboards can dramatically elevate the look of any room, but when you’re working with beautiful hardwood floors, the stakes are even higher. Splatter, drips, or improper preparation can lead to costly damage and a less-than-professional finish. This comprehensive guide provides the definitive answer to the question: what’s the best way to paint baseboards with hardwood floors? We’ll walk you through every step, from meticulous preparation to flawless application, ensuring a professional-looking result while protecting your valuable hardwood.
Unlike quick tutorials that gloss over crucial details, this guide dives deep into the nuances of painting baseboards with hardwood floors, drawing upon years of combined experience and best practices. Whether you’re a seasoned DIYer or a first-time homeowner, you’ll gain the knowledge and confidence to tackle this project like a pro. We’ll cover everything from selecting the right paint and tools to mastering essential techniques and avoiding common pitfalls. Prepare to transform your space with perfectly painted baseboards that complement your hardwood floors beautifully.
Essential Preparation: Protecting Your Hardwood and Ensuring a Lasting Finish
Proper preparation is the cornerstone of any successful paint job, especially when delicate hardwood floors are involved. Rushing this stage can lead to hours of cleanup, costly repairs, or a less-than-perfect finish. Here’s a detailed breakdown of the steps you need to take:
1. Gather Your Supplies: The Right Tools for the Job
Having the right tools at your disposal will make the entire process smoother, more efficient, and ultimately, more successful. Here’s a comprehensive list:
- Painter’s Tape: High-quality painter’s tape designed for delicate surfaces is crucial for protecting your hardwood floors. We recommend a low-tack tape to minimize the risk of damage upon removal.
- Drop Cloths: Canvas drop cloths are preferable to plastic as they are more durable, absorbent, and less slippery. They provide an extra layer of protection against accidental spills and splatters.
- Paintbrushes: Invest in high-quality angled brushes in various sizes. A 2-inch brush is ideal for general painting, while a smaller brush (1-inch or 1.5-inch) is perfect for detail work and corners.
- Paint Roller (Optional): For larger, flatter baseboards, a small paint roller with a fine nap can speed up the process and provide a smoother finish.
- Paint Tray: A paint tray with a disposable liner will keep your work area clean and organized.
- Primer: A high-quality primer is essential for ensuring proper paint adhesion and a uniform finish. Choose a primer that is compatible with both your baseboard material and your chosen paint.
- Paint: Select a durable, washable paint in your desired color and sheen. We recommend a semi-gloss or satin finish for baseboards, as these finishes are easy to clean and resist scuffs and stains.
- Putty Knife: For patching nail holes or imperfections in the baseboards.
- Wood Filler: To fill nail holes and imperfections.
- Sandpaper: Fine-grit sandpaper (220-grit or higher) for smoothing surfaces and feathering edges.
- Cleaning Supplies: A vacuum cleaner, damp cloths, and a mild detergent for cleaning the baseboards before painting.
- Caulk and Caulk Gun (Optional): For sealing gaps between the baseboards and the wall or floor.
- Safety Glasses and Gloves: To protect your eyes and hands from paint and chemicals.
2. Meticulous Protection: Safeguarding Your Hardwood Floors
This is arguably the most critical step. Take your time and pay close attention to detail to prevent paint from coming into contact with your hardwood floors.
- Vacuum the Area: Thoroughly vacuum the perimeter of the room, paying special attention to the area where the baseboards meet the floor. This will remove any dust, dirt, or debris that could interfere with the adhesion of the painter’s tape.
- Apply Painter’s Tape: Apply painter’s tape along the top edge of the hardwood floor, where it meets the baseboard. Ensure the tape is firmly pressed down to create a tight seal. Overlap the tape slightly for maximum protection.
- Extend Protection with Drop Cloths: Place drop cloths along the baseboards, overlapping them slightly with the painter’s tape. This will provide an extra layer of protection against accidental spills and splatters.
3. Baseboard Preparation: Creating a Smooth Canvas
Preparing the baseboards properly will ensure optimal paint adhesion and a flawless finish.
- Clean the Baseboards: Use a damp cloth and a mild detergent to clean the baseboards, removing any dust, dirt, or grime. Allow the baseboards to dry completely before proceeding.
- Sand the Baseboards: Lightly sand the baseboards with fine-grit sandpaper to create a slightly rough surface that will promote paint adhesion. Focus on areas with existing imperfections or glossy finishes.
- Patch Imperfections: Use a putty knife to apply wood filler to any nail holes, cracks, or imperfections in the baseboards. Allow the filler to dry completely, then sand it smooth with fine-grit sandpaper.
- Caulk Gaps (Optional): If there are any gaps between the baseboards and the wall or floor, apply a bead of caulk along the seams. Smooth the caulk with your finger or a damp cloth.
The Art of Application: Achieving a Flawless Finish
With the preparation complete, it’s time to move on to the painting process. Here’s how to achieve a flawless finish on your baseboards:
1. Priming: The Foundation for a Beautiful Finish
Applying a primer is a crucial step that should not be skipped. Primer provides a uniform surface for the paint to adhere to, ensuring better coverage and a more durable finish.
- Apply a Thin, Even Coat: Using a paintbrush or a small roller, apply a thin, even coat of primer to the baseboards. Avoid applying too much primer, as this can lead to drips and runs.
- Allow to Dry Completely: Allow the primer to dry completely according to the manufacturer’s instructions. This is essential for proper paint adhesion.
- Lightly Sand (Optional): Once the primer is dry, lightly sand it with fine-grit sandpaper to create an even smoother surface for the paint.
2. Painting: Mastering the Techniques for a Professional Look
The key to achieving a professional-looking paint job is to use the right techniques and apply thin, even coats of paint.
- Apply Thin Coats: Apply thin, even coats of paint to the baseboards, using a paintbrush or a small roller. Avoid applying too much paint, as this can lead to drips and runs. Two thin coats are always better than one thick coat.
- Use Proper Brush Techniques: When using a paintbrush, hold it at a slight angle and apply the paint in long, even strokes. Overlap each stroke slightly to ensure complete coverage.
- Cut In Carefully: Use a small brush to carefully cut in along the edges of the baseboards, where they meet the wall or floor. This will create a clean, crisp line and prevent paint from getting on the wall or floor.
- Allow to Dry Completely: Allow each coat of paint to dry completely according to the manufacturer’s instructions before applying the next coat.
3. Touch-Ups and Final Inspection: The Finishing Touches
Once the final coat of paint is dry, carefully inspect the baseboards for any imperfections or areas that need touch-ups.
- Touch Up Imperfections: Use a small brush to touch up any imperfections or areas that need additional coverage.
- Remove Painter’s Tape Carefully: Carefully remove the painter’s tape, pulling it away from the baseboards at a 45-degree angle. This will help prevent the paint from peeling off with the tape.
- Inspect for Damage: Inspect the hardwood floors for any paint splatters or damage. Clean up any spills immediately with a damp cloth.
Choosing the Right Paint and Sheen: A Guide to Making the Best Selection
Selecting the right paint and sheen is essential for achieving a durable and aesthetically pleasing finish on your baseboards. Here’s a breakdown of the factors to consider:
1. Paint Type: Latex vs. Oil-Based
Latex paint is the most popular choice for interior painting due to its ease of use, low odor, and quick drying time. It’s also more environmentally friendly than oil-based paint. Oil-based paint, on the other hand, provides a harder, more durable finish that is resistant to scratches and stains. However, it has a strong odor, requires longer drying time, and is more difficult to clean up. For baseboards, we generally recommend latex paint for its ease of use and durability, particularly if you choose a high-quality acrylic latex formula.
2. Sheen: Gloss, Semi-Gloss, Satin, or Matte
The sheen of the paint refers to its level of glossiness. Higher sheens are more durable and easier to clean, but they also tend to show imperfections more easily. Lower sheens are less durable but provide a softer, more matte finish. Here’s a breakdown of the most common sheens for baseboards:
- Gloss: The most durable and easiest to clean sheen, but also the most reflective and likely to show imperfections.
- Semi-Gloss: A good compromise between durability and aesthetics. It’s easy to clean and provides a subtle sheen that is not too reflective.
- Satin: A popular choice for baseboards, as it provides a soft, velvety finish that is less reflective than semi-gloss. It’s also relatively easy to clean.
- Matte: The least reflective sheen, providing a flat, non-glossy finish. It’s not as durable or easy to clean as higher sheens, and it’s more likely to show stains and scuffs.
For baseboards, we recommend a semi-gloss or satin finish. These sheens provide a good balance of durability, aesthetics, and ease of cleaning.
3. Color Selection: Complementing Your Hardwood Floors
Choosing the right color for your baseboards can enhance the overall look of your room and complement your hardwood floors. Consider the following factors when selecting a color:
- The Color of Your Hardwood Floors: Choose a color that complements the color of your hardwood floors. For example, if you have light-colored hardwood floors, you might choose a white or off-white color for your baseboards. If you have dark-colored hardwood floors, you might choose a darker color for your baseboards.
- The Color of Your Walls: Choose a color that complements the color of your walls. You can choose a color that is the same as your walls for a seamless look, or you can choose a contrasting color for a more dramatic effect.
- The Overall Style of Your Room: Consider the overall style of your room when selecting a color. For example, if you have a traditional room, you might choose a classic white or cream color for your baseboards. If you have a modern room, you might choose a bolder color for your baseboards.
Common Mistakes to Avoid When Painting Baseboards with Hardwood Floors
Even with careful preparation and execution, it’s easy to make mistakes when painting baseboards with hardwood floors. Here are some common pitfalls to avoid:
- Skipping Preparation: As mentioned earlier, proper preparation is essential for a successful paint job. Don’t skip steps like cleaning, sanding, and patching imperfections.
- Using the Wrong Tape: Using the wrong type of painter’s tape can damage your hardwood floors or leave behind residue. Always use a low-tack tape designed for delicate surfaces.
- Applying Too Much Paint: Applying too much paint can lead to drips, runs, and a less-than-professional finish. Apply thin, even coats of paint and allow each coat to dry completely before applying the next.
- Not Protecting Your Floors Adequately: Insufficient protection can lead to paint splatters and stains on your hardwood floors. Use drop cloths and painter’s tape to protect your floors adequately.
- Rushing the Process: Painting baseboards takes time and patience. Don’t rush the process, or you’re more likely to make mistakes. Take your time and pay attention to detail.
- Neglecting Ventilation: Ensure adequate ventilation in the room while painting to avoid inhaling harmful fumes. Open windows and use a fan to circulate air.
Beyond the Basics: Advanced Techniques for a Truly Professional Finish
For those seeking to elevate their baseboard painting skills to the next level, consider these advanced techniques:
- Back-Brushing: After rolling paint onto the baseboards, use a brush to smooth out any roller marks and ensure a uniform finish.
- Feathering: When cutting in, feather the edges of the paint to create a seamless transition between the baseboards and the wall.
- Using a Paint Extender: Adding a paint extender to your paint can help to slow down the drying time and prevent brush marks.
- Spraying: For a truly flawless finish, consider using a paint sprayer. However, this requires more skill and preparation.
Achieving Perfection: Your Guide to Beautiful Baseboards
Painting baseboards with hardwood floors doesn’t have to be a daunting task. By following these steps and taking your time, you can achieve a professional-looking finish that enhances the beauty of your home. Remember, the best way to paint baseboards with hardwood floors involves meticulous preparation, careful application, and attention to detail. From selecting the right paint and tools to mastering essential techniques, every step contributes to the final result. So, gather your supplies, protect your floors, and get ready to transform your space with perfectly painted baseboards.
