Master Guide: Replacing Your Bathtub Faucet and Drain Like a Pro
Is your bathtub faucet dripping incessantly, turning your relaxing bath into a frustrating water waste? Or perhaps your drain is clogged beyond belief, rendering your tub unusable? You’re not alone! Many homeowners face these common bathroom woes. The good news is that tackling this project yourself is entirely achievable with the right knowledge and tools. This comprehensive guide on how to replace bathtub faucet and drain will arm you with the expertise to confidently complete the task, saving you money and the hassle of calling a plumber. We’ll walk you through each step, from identifying the right replacement parts to troubleshooting common issues. Prepare to transform your bathroom with this detailed, user-friendly guide!
Understanding Your Bathtub Faucet and Drain System
Before diving into the replacement process, it’s crucial to understand the components and their functions. The bathtub faucet controls the flow of water, mixing hot and cold to achieve your desired temperature. The drain assembly, typically consisting of a stopper, flange, and drainpipe, allows water to exit the tub. Understanding the interplay between these parts is key to a successful replacement.
Different Types of Bathtub Faucets
Bathtub faucets come in various styles, each with its own installation requirements. Common types include:
- Deck-Mounted Faucets: These faucets are installed directly onto the bathtub deck or surround.
- Wall-Mounted Faucets: As the name suggests, these faucets are mounted on the wall above the bathtub.
- Roman Tub Faucets: These elegant faucets are typically installed on a wide bathtub deck and feature separate hot and cold water handles.
- Shower/Tub Faucets: Combine a faucet with a showerhead diverter.
Bathtub Drain Components Explained
The bathtub drain assembly is more complex than it appears. Here’s a breakdown of the key components:
- Stopper: The visible part that blocks the drain opening. Common types include lift-and-turn, pop-up, and toe-touch stoppers.
- Flange: The metal ring that sits flush against the bathtub surface around the drain opening.
- Drainpipe: The pipe that connects the drain assembly to the main drain line.
- Overflow Pipe: Prevents overflow.
Essential Tools and Materials for Replacing Your Bathtub Faucet and Drain
Having the right tools and materials on hand is essential for a smooth and efficient replacement process. Here’s a comprehensive list:
- New Bathtub Faucet and Drain Assembly: Choose a replacement that matches your existing style and plumbing connections.
- Basin Wrench: Used to loosen and tighten nuts in tight spaces, particularly under the sink.
- Adjustable Wrench: For general tightening and loosening of nuts and bolts.
- Pliers: For gripping and manipulating small parts.
- Screwdrivers (Phillips and Flathead): For removing screws.
- Putty Knife or Scraper: For removing old caulk and plumber’s putty.
- Plumber’s Putty: To create a watertight seal around the drain flange.
- Teflon Tape: To seal threaded connections.
- Penetrating Oil: To loosen corroded or stuck parts.
- Clean Rags or Towels: For cleaning up spills and messes.
- Bucket: To catch water.
- Safety Glasses: To protect your eyes.
- Gloves: To protect your hands.
- Hacksaw (optional): May be needed to cut old drainpipes.
- Thread Sealant: An alternative to Teflon tape.
Step-by-Step Guide: Replacing Your Bathtub Faucet
Replacing your bathtub faucet can seem daunting, but by following these steps carefully, you can achieve professional results.
1. Shut Off the Water Supply
The first and most important step is to shut off the water supply to the faucet. Locate the shut-off valves for both hot and cold water, usually located under the sink or in an access panel behind the tub. Turn the valves clockwise until they are completely closed. After shutting off the water supply, turn on the old faucet to relieve any remaining pressure in the pipes.
2. Remove the Old Faucet
Depending on the type of faucet you have, the removal process may vary slightly. However, the general steps are as follows:
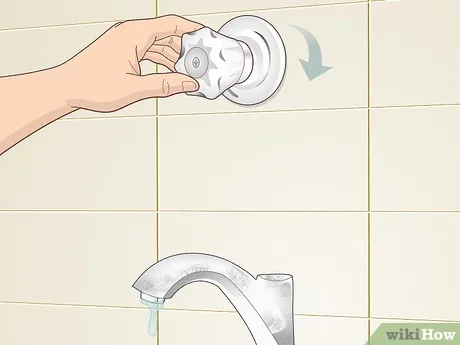
- Remove Handles: Use a screwdriver to remove any screws securing the handles. Then, gently pull the handles off the faucet stems.
- Disconnect Water Lines: Use a basin wrench or adjustable wrench to disconnect the water lines from the faucet. Have a bucket handy to catch any remaining water in the pipes.
- Loosen Mounting Nuts: Use a basin wrench to loosen the nuts that secure the faucet to the bathtub or wall.
- Remove the Faucet: Once the mounting nuts are loosened, carefully remove the old faucet from its position.
3. Clean the Area
Before installing the new faucet, thoroughly clean the area around the faucet opening. Remove any old caulk, plumber’s putty, or debris. Use a scraper or putty knife to remove stubborn residue. Ensure the surface is clean and dry for proper sealing.
4. Install the New Faucet
Follow the manufacturer’s instructions for installing the new faucet. Here are some general guidelines:
- Apply Teflon Tape: Wrap Teflon tape around the threads of the faucet stems to create a watertight seal.
- Connect Water Lines: Connect the water lines to the faucet stems, tightening the connections with a basin wrench or adjustable wrench.
- Secure the Faucet: Install the mounting nuts and tighten them securely with a basin wrench.
- Install Handles: Attach the handles to the faucet stems and secure them with screws.
5. Turn on the Water Supply and Check for Leaks
Slowly turn on the water supply and check for any leaks around the faucet connections. If you notice any leaks, tighten the connections further. If the leaks persist, you may need to reapply Teflon tape or tighten the mounting nuts.
Replacing Your Bathtub Drain: A Comprehensive Guide
Replacing the bathtub drain requires a slightly different approach. Here’s a detailed guide to help you through the process.
1. Prepare the Area
Start by removing the old stopper from the drain. Depending on the type of stopper you have, you may need to lift it out, unscrew it, or use a special tool to remove it. Clean the area around the drain opening, removing any old caulk or plumber’s putty.
2. Loosen the Drain Nut
The drain nut is located underneath the bathtub and connects the drain assembly to the drainpipe. Use a basin wrench to loosen the drain nut. This may require some effort, especially if the nut is corroded or stuck. Applying penetrating oil can help loosen the nut.
3. Remove the Old Drain Assembly
Once the drain nut is loosened, carefully remove the old drain assembly from the bathtub. You may need to wiggle it back and forth to break the seal. Be prepared for some water to spill out.
4. Clean the Drain Opening
Thoroughly clean the drain opening, removing any old plumber’s putty or debris. Use a scraper or putty knife to remove stubborn residue. Ensure the surface is clean and dry for proper sealing.
5. Install the New Drain Assembly
Follow the manufacturer’s instructions for installing the new drain assembly. Here are some general guidelines:
- Apply Plumber’s Putty: Roll a rope of plumber’s putty and apply it to the underside of the drain flange.
- Insert the Drain Flange: Insert the drain flange into the drain opening, pressing it firmly into the plumber’s putty.
- Attach the Drainpipe: From underneath the bathtub, attach the drainpipe to the drain assembly, tightening the drain nut with a basin wrench.
- Install the Stopper: Install the new stopper according to the manufacturer’s instructions.
6. Test for Leaks
Fill the bathtub with a few inches of water and check for any leaks around the drain flange and drainpipe connections. If you notice any leaks, tighten the connections further. If the leaks persist, you may need to reapply plumber’s putty or tighten the drain nut.
Troubleshooting Common Issues
Even with careful planning and execution, you may encounter some common issues during the replacement process. Here are some troubleshooting tips:
- Stuck Drain Nut: If the drain nut is stuck, apply penetrating oil and let it soak for several hours before attempting to loosen it. You can also try using a pipe wrench for added leverage.
- Leaking Connections: If you experience leaks after installing the new faucet or drain, tighten the connections further. You may also need to reapply Teflon tape or plumber’s putty.
- Incorrect Faucet Size: Make sure you purchase a faucet with the correct spout length and valve compatibility for your bathtub.
- Stripped Screw Heads: Use a screw extractor to remove stripped screws.
Choosing the Right Replacement Parts: Prioritizing Quality and Durability
Selecting high-quality replacement parts is crucial for ensuring a long-lasting and reliable repair. Consider the following factors when choosing a new bathtub faucet and drain assembly:
- Material: Look for faucets and drains made from durable materials such as solid brass or stainless steel. These materials are resistant to corrosion and wear.
- Finish: Choose a finish that complements your bathroom décor and is resistant to tarnishing and scratching.
- Valve Type: For faucets, consider the valve type. Ceramic disc valves are known for their durability and smooth operation.
- Warranty: Look for products with a generous warranty, which indicates the manufacturer’s confidence in their product.
- Brand Reputation: Opt for reputable brands known for producing high-quality plumbing fixtures.
Maintaining Your New Bathtub Faucet and Drain
Proper maintenance can extend the lifespan of your new bathtub faucet and drain. Here are some tips:
- Clean Regularly: Clean your faucet and drain regularly with a mild soap and water solution. Avoid using abrasive cleaners, which can damage the finish.
- Check for Leaks: Periodically check for leaks around the faucet connections and drain flange. Address any leaks promptly to prevent water damage.
- Remove Hair and Debris: Regularly remove hair and debris from the drain to prevent clogs.
- Lubricate Moving Parts: Lubricate the faucet handles and drain stopper with a silicone-based lubricant to ensure smooth operation.
The Long-Term Value of DIY Plumbing Repairs
Taking on plumbing repairs yourself, like how to replace bathtub faucet and drain, provides more than just immediate savings. It empowers you with valuable skills, increases your home maintenance knowledge, and gives you a deeper understanding of your home’s systems. Furthermore, successfully completing such a project boosts confidence and provides a sense of accomplishment. By investing time in learning these skills, you become a more resourceful and self-sufficient homeowner. Share your experiences with replacing your bathtub faucet and drain in the comments below and contribute to our community knowledge base!
