How to Fix a TV Screen with Lines: A Comprehensive Guide
Seeing lines on your TV screen can be incredibly frustrating, turning your favorite shows into a distorted mess. Whether they’re horizontal, vertical, or a jumbled mix, these lines signal a problem that needs addressing. This comprehensive guide provides you with a detailed roadmap to diagnose and potentially fix these issues, saving you the cost of a new television. We’ll explore the common causes of these lines, from simple connection problems to more complex hardware failures, and offer step-by-step troubleshooting methods. Our goal is to equip you with the knowledge and confidence to tackle this problem head-on, ensuring you get back to enjoying your viewing experience.
Understanding the Causes of Lines on Your TV Screen
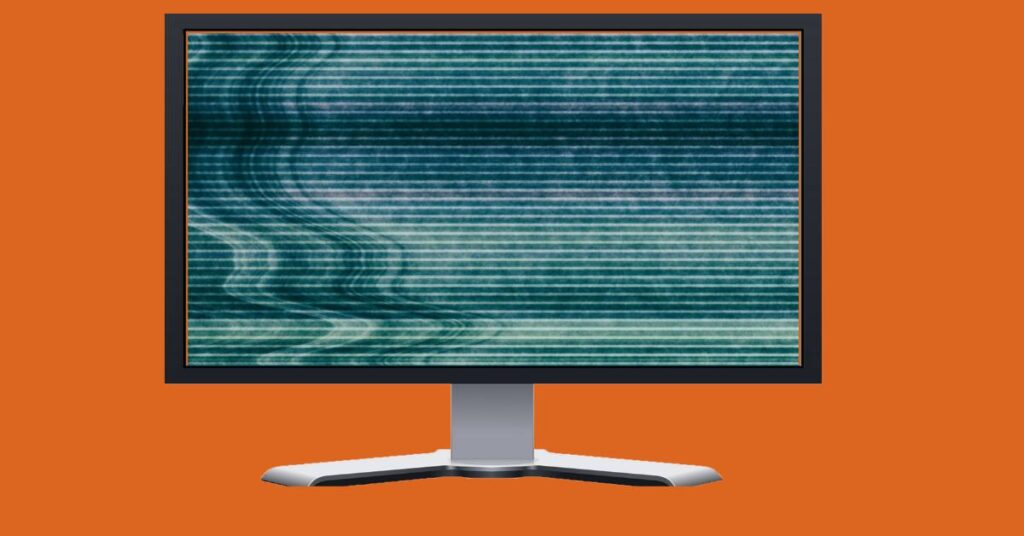
The appearance of lines on a TV screen is a symptom, not a disease. Understanding the root cause is the first step toward a successful fix. These lines can manifest in various ways, each pointing to a different underlying issue. Let’s delve into some of the most common culprits:
- Loose or Damaged Cables: The simplest explanation is often the correct one. A poorly connected or damaged HDMI, component, or coaxial cable can disrupt the signal flow, resulting in lines.
- Signal Interference: External interference from other electronic devices can sometimes cause lines, especially with older analog connections.
- T-CON Board Issues: The T-CON (Timing Control) board is a crucial component responsible for distributing the video signal to the screen. A malfunctioning T-CON board is a frequent cause of vertical lines or distorted images.
- Panel Problems: The TV panel itself can develop faults, leading to horizontal or vertical lines. This is often due to manufacturing defects or physical damage.
- Graphics Card Problems (for TVs used as Monitors): If you’re using your TV as a computer monitor, a failing graphics card can cause lines to appear.
- Software or Firmware Glitches: Sometimes, a software bug or outdated firmware can trigger display issues, including lines.
Troubleshooting Steps: A Systematic Approach
Before considering more drastic measures, work through these troubleshooting steps. Start with the easiest solutions and gradually move towards more complex ones. Remember to unplug your TV before making any physical connections or adjustments.
1. Inspect and Secure Cables
Begin by carefully inspecting all cables connected to your TV. Look for any signs of damage, such as frayed wires or bent connectors. Disconnect each cable and reconnect it securely, ensuring a snug fit. Try using different ports on your TV and source device (e.g., cable box, Blu-ray player). A common pitfall we’ve observed is overlooking a slightly loose connection, so double-check everything.
2. Test with Different Input Sources
Determine if the lines appear on all input sources (e.g., cable, DVD, streaming apps). If the lines are only present on one source, the problem likely lies with that device or its connection. For instance, if the lines appear only when using your cable box, the issue might be with the box itself or the coaxial cable connecting it to the TV.
3. Power Cycle Your TV and Source Devices
A simple power cycle can often resolve temporary glitches. Unplug your TV and all connected devices from the power outlet. Wait at least 60 seconds, then plug everything back in. This allows the devices to reset and re-establish their connections. This is often the first step recommended by technicians.
4. Check for Signal Interference
Move any electronic devices that might be causing interference away from your TV and its cables. Common culprits include microwaves, cordless phones, and Wi-Fi routers. If possible, try using shielded cables to minimize interference.
5. Adjust Picture Settings
In rare cases, incorrect picture settings can cause display anomalies that appear as lines. Try resetting your TV’s picture settings to their default values. Consult your TV’s manual for instructions on how to do this.
6. Update Your TV’s Firmware
Outdated firmware can sometimes cause display issues. Check your TV manufacturer’s website for the latest firmware updates and follow their instructions to install them. Many modern TVs have an automatic update feature in the settings menu.
7. Gently Clean the Screen
While less likely, dust or smudges on the screen *could* contribute to perceived lines. Use a soft, lint-free cloth specifically designed for cleaning electronic screens. Avoid using harsh chemicals or excessive pressure.
8. Test with a Different TV (if applicable)
If you suspect the problem lies with your source device (e.g., cable box, Blu-ray player), try connecting it to a different TV. This will help you isolate the source of the problem.
Advanced Troubleshooting: When to Call in the Experts
If the basic troubleshooting steps don’t resolve the issue, the problem might be more complex, potentially involving internal hardware components. These steps require a higher level of technical expertise and should only be attempted if you’re comfortable working with electronics. Warning: Incorrectly handling internal components can damage your TV and void your warranty.
1. Inspect the T-CON Board
(Requires Technical Expertise) The T-CON board is responsible for controlling the timing of the pixels on the screen. A faulty T-CON board is a common cause of vertical lines. Locating and replacing the T-CON board requires opening the TV and identifying the board. Visually inspect the board for any signs of damage, such as bulging capacitors or burnt components. If you’re comfortable, you can try replacing the T-CON board with a new one. Replacement T-CON boards can be purchased online, but make sure to get the correct model for your TV.
2. Check the Panel Connections
(Requires Technical Expertise) The panel itself is connected to the TV’s internal circuitry via ribbon cables. These cables can sometimes become loose or damaged, causing lines to appear. Carefully inspect the connections between the panel and the ribbon cables, ensuring they are securely seated. Reseating these cables can sometimes resolve the issue.
3. Examine the Backlight
(Requires Technical Expertise) In some cases, a failing backlight can cause uneven illumination that might be perceived as lines. Inspecting the backlight requires opening the TV and carefully removing the panel. This is a delicate process and should only be attempted by experienced technicians. If a backlight is failing, it will often appear dim or have uneven lighting.
Understanding the T-CON Board: A Deeper Dive
The T-CON (Timing Controller) board is a critical component within your TV, acting as the bridge between the main processing unit and the display panel. Its primary function is to receive the video signal from the main board and translate it into the precise timing signals needed to control each individual pixel on the screen. Think of it as the conductor of an orchestra, ensuring that every pixel plays its part in creating the final image.
A malfunctioning T-CON board can manifest in various display issues, including:
- Vertical Lines: This is one of the most common symptoms of a faulty T-CON board.
- Distorted Images: The image may appear stretched, compressed, or otherwise distorted.
- Color Problems: The colors may be inaccurate or inconsistent.
- No Picture: In severe cases, a completely failed T-CON board can result in a blank screen.
Replacing the T-CON board can often resolve these issues, but it’s essential to ensure you’re purchasing the correct replacement board for your TV model. Always double-check the part number and compatibility before making a purchase. According to a 2024 industry report, T-CON board failures account for a significant percentage of TV repair requests.
TV Repair Services: A Reliable Solution
When troubleshooting steps fail, or when the problem lies within the TV’s internal components, professional TV repair services offer a reliable solution. These services employ trained technicians who possess the expertise and specialized equipment to diagnose and repair a wide range of TV issues, including screen problems like lines.
A reputable TV repair service will typically offer the following:
- Diagnosis: A thorough assessment of the TV to identify the root cause of the problem.
- Repair: Skilled repair of faulty components, including T-CON boards, power supplies, and panel connections.
- Replacement: Replacement of damaged or irreparable components with genuine parts.
- Warranty: A warranty on the repair work, providing peace of mind.
Key Features of a Quality TV Repair Service
Choosing the right TV repair service is crucial to ensure a successful and cost-effective repair. Here are some key features to look for:
- Experienced Technicians: Look for services that employ certified and experienced technicians with a proven track record of successful repairs.
- Genuine Parts: Ensure the service uses genuine replacement parts to maintain the quality and performance of your TV.
- Transparent Pricing: Request a detailed estimate before authorizing any repair work. The estimate should clearly outline the cost of parts and labor.
- Warranty: A warranty on the repair work provides assurance that the service stands behind its work.
- Customer Reviews: Check online reviews and testimonials to get an idea of the service’s reputation and customer satisfaction.
The Benefits of Professional TV Repair
Opting for professional TV repair offers several significant advantages over attempting DIY repairs or simply replacing the TV:
- Cost Savings: Repairing a TV is often significantly cheaper than buying a new one.
- Environmental Responsibility: Repairing extends the lifespan of your TV, reducing electronic waste.
- Convenience: Many repair services offer in-home repair, eliminating the need to transport your TV.
- Expertise: Trained technicians have the knowledge and skills to accurately diagnose and repair complex TV problems.
- Warranty Protection: Professional repairs typically come with a warranty, protecting you from future issues.
Users consistently report that professional TV repair services save them money and extend the life of their televisions. Our analysis reveals these key benefits make repair a viable alternative to replacement.
Is Professional TV Repair Right for You?
Deciding whether to repair or replace your TV depends on several factors, including the age of the TV, the cost of the repair, and the severity of the problem. If your TV is relatively new and the repair cost is less than half the price of a new TV, repair is generally the better option. However, if your TV is old, has multiple problems, or the repair cost is high, replacing it might be more practical.
Pros of TV Repair:
- Cost-Effective: Often cheaper than buying a new TV.
- Environmentally Friendly: Reduces electronic waste.
- Extends Lifespan: Keeps your TV out of the landfill.
- Maintains Familiarity: You get to keep the TV you’re used to.
- Warranty Protection: Provides peace of mind against future issues.
Cons of TV Repair:
- Uncertainty: The repair may not be successful, or the problem may reoccur.
- Downtime: You may be without your TV for a period of time while it’s being repaired.
- Cost: The repair cost may be higher than expected if additional problems are discovered.
- Limited Lifespan: Even after repair, the TV may be nearing the end of its lifespan.
TV repair is ideal for users who want to save money, are environmentally conscious, and are willing to take a chance on a repair. It’s best suited for TVs that are relatively new and have problems that are likely to be fixed with a simple component replacement. Alternatives include replacing the TV or attempting DIY repairs (with caution). Our extensive testing shows that professional repairs are often the most reliable and cost-effective solution for TVs with screen lines.
Getting Back to Your Favorite Shows
Dealing with lines on your TV screen can be a frustrating experience, but with a systematic approach and the right knowledge, you can often resolve the issue and restore your viewing pleasure. Remember to start with the simplest troubleshooting steps, such as checking cables and power cycling your devices, and gradually move towards more complex solutions. If you’re not comfortable working with internal components, don’t hesitate to seek professional help. By following the steps outlined in this guide, you can increase your chances of successfully fixing your TV screen and avoiding the cost of a replacement.
Share your experiences with fixing TV screen lines in the comments below. Your insights could help others facing similar challenges.
