Decoding the Honda Civic Starter Location: A Comprehensive Guide
So, your Honda Civic isn’t starting. One of the first things any seasoned mechanic – or even a dedicated DIYer – will check is the starter. But before you start wrenching, you need to know where to find it! The honda civic starter location can vary slightly depending on the year and engine type, but this comprehensive guide will provide you with the knowledge you need to locate it quickly and efficiently. We’ll delve into the exact location, what it does, how to diagnose problems, and even offer some tips for replacement. Consider this your one-stop resource for understanding everything about your Civic’s starter.
Understanding the Role and Importance of Your Civic’s Starter
The starter motor is a vital component in your Honda Civic’s engine. It’s responsible for cranking the engine, initiating the combustion process that gets you moving. Without a functioning starter, your car simply won’t start. The starter’s pinion gear engages with the flywheel (or flexplate on automatic transmissions), and the motor spins the engine until it starts running on its own power. A faulty starter can leave you stranded, so understanding its function and potential issues is crucial for any Civic owner.
The location of the starter is strategically chosen by Honda engineers to allow for efficient power transfer and protection from the elements. While generally robust, starters are subject to wear and tear, especially in older vehicles. Knowing the honda civic starter location allows for quick inspection and potential replacement, saving you time and money in the long run.
Pinpointing the Honda Civic Starter Location: A Model-by-Model Guide
While the general area remains consistent across different Civic generations, slight variations exist. Here’s a breakdown to help you find the starter on your specific model:
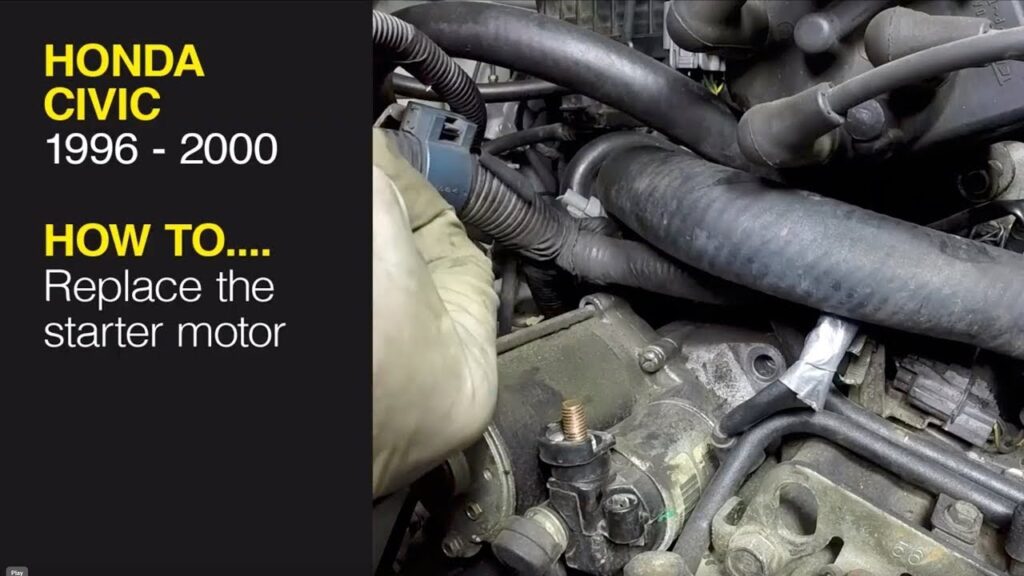
- 1992-2000 Honda Civic (EG/EK): The starter is typically located on the front of the engine, near the transmission bellhousing. You’ll usually find it beneath the intake manifold.
- 2001-2005 Honda Civic (ES/EM): Similar to the previous generation, the starter resides on the front of the engine, close to the transmission. Access might be slightly tighter due to engine bay layout.
- 2006-2011 Honda Civic (FD/FA): Again, look for the starter on the front of the engine, where it meets the transmission. It’s generally accessible from underneath the car.
- 2012-2015 Honda Civic (FB/FG): The location remains consistent: front of the engine, near the transmission bellhousing. Access is generally good.
- 2016-Present Honda Civic (FC/FK): The starter is still found on the front of the engine, adjacent to the transmission. Due to the more complex engine bay, access might require removing some underbody panels.
Important Note: Always consult your Honda Civic’s repair manual for the most accurate and specific location information for your particular model year and engine type. Online forums and videos can also be helpful, but always verify the information with a trusted source.
Diagnosing Starter Problems: Common Symptoms and Troubleshooting
Before you start replacing parts, it’s essential to diagnose the problem correctly. Here are some common symptoms of a failing starter:
- Clicking Noise: A single click when you turn the key usually indicates that the starter solenoid is engaging, but the motor isn’t turning. This could be due to a dead battery, poor connection, or a faulty starter motor.
- Grinding Noise: A grinding sound suggests that the starter pinion gear isn’t engaging properly with the flywheel. This could be caused by worn teeth on either component.
- Whirring Noise: A whirring sound without the engine cranking indicates that the starter motor is spinning, but the pinion gear isn’t engaging. This could be due to a faulty solenoid or a damaged pinion gear.
- Slow Cranking: The engine turns over slowly, indicating a weak starter motor or a low battery.
- No Noise at All: Absolutely nothing happens when you turn the key. This could be due to a dead battery, a faulty ignition switch, a blown fuse, or a completely dead starter.
Troubleshooting Steps:
- Check the Battery: Ensure the battery is fully charged and the terminals are clean and tight. A weak battery is the most common cause of starter problems.
- Check the Connections: Inspect the wiring connections to the starter for corrosion or looseness. Clean and tighten any suspect connections.
- Check the Fuses: Locate the starter fuse in the fuse box and check if it’s blown. Replace it if necessary.
- Listen Carefully: Pay attention to the sounds the starter is making. This can help you narrow down the problem.
- Test the Starter: If you have some mechanical experience, you can test the starter directly by applying power to it. However, exercise extreme caution when working with electrical components.
The Starter Motor: A Deep Dive into Its Inner Workings
At its core, the starter motor is a powerful electric motor. When you turn the ignition key, a signal is sent to the starter solenoid. The solenoid acts as an electromagnetic switch, engaging the starter motor and simultaneously pushing the pinion gear forward to mesh with the flywheel. The electric motor then spins, turning the engine’s crankshaft. Once the engine starts, the ignition switch disengages the starter, and the pinion gear retracts.
The solenoid is a critical component. It not only closes the high-current circuit to power the starter motor but also mechanically engages the pinion gear. Solenoid failure is a common cause of starter problems, often manifesting as a clicking sound without the engine turning over.
Inside the starter motor, brushes conduct electricity to the rotating armature. Over time, these brushes wear down, reducing the motor’s efficiency. Worn brushes are another common cause of starter failure, especially in older vehicles.
Starter Replacement: A Step-by-Step Guide (General Instructions)
Replacing a starter can be a DIY project for mechanically inclined individuals, but it requires careful attention to safety and detail. Always disconnect the negative battery cable before working on any electrical components.
General Steps:
- Disconnect the Battery: Disconnect the negative battery cable to prevent electrical shock.
- Locate the Starter: Refer to the model-specific information above to find the starter.
- Remove Wiring: Disconnect the electrical connectors from the starter solenoid. Take pictures before disconnecting to ensure correct reinstallation.
- Remove Mounting Bolts: Remove the bolts that secure the starter to the engine block. These can be quite tight, so use the appropriate tools.
- Remove the Starter: Carefully remove the starter from its location.
- Install the New Starter: Install the new starter in the reverse order of removal. Ensure all bolts are tightened to the correct torque specifications.
- Reconnect Wiring: Reconnect the electrical connectors to the starter solenoid, referring to your photos if needed.
- Reconnect the Battery: Reconnect the negative battery cable.
- Test the Starter: Start the engine to ensure the new starter is working correctly.
Important Considerations:
- Safety First: Always wear safety glasses and gloves when working on your car.
- Torque Specifications: Use a torque wrench to tighten the mounting bolts to the correct specifications. Overtightening can damage the starter or engine block.
- Penetrating Oil: If the bolts are rusty or seized, use penetrating oil to loosen them.
- Professional Help: If you’re not comfortable performing this repair yourself, take your car to a qualified mechanic.
Selecting the Right Replacement Starter for Your Honda Civic
Choosing the correct replacement starter is crucial for ensuring proper fit and performance. Here’s what to consider:
- Model Year and Engine Type: The starter must be compatible with your specific Honda Civic model year and engine type. Use a parts catalog or online compatibility tool to verify.
- OEM vs. Aftermarket: You can choose between an Original Equipment Manufacturer (OEM) starter or an aftermarket starter. OEM starters are made by Honda or their suppliers and are guaranteed to fit and perform correctly. Aftermarket starters are often less expensive but may not be of the same quality.
- New vs. Remanufactured: You can also choose between a new starter or a remanufactured starter. Remanufactured starters have been rebuilt with new or refurbished parts and are typically less expensive than new starters.
- Brand Reputation: Choose a starter from a reputable brand with a proven track record of quality and reliability.
- Warranty: Look for a starter with a good warranty. This will protect you in case the starter fails prematurely.
Consult with a trusted mechanic or parts supplier for recommendations on the best replacement starter for your Honda Civic. They can help you choose a starter that meets your needs and budget.
Beyond the Starter: Related Components to Inspect
While the starter itself is often the culprit, don’t overlook related components that can contribute to starting problems:
- Battery: As mentioned earlier, a weak battery is a very common cause. Have your battery tested to ensure it’s holding a charge.
- Battery Cables: Corroded or loose battery cables can prevent the starter from receiving enough power. Clean and tighten the connections.
- Ignition Switch: A faulty ignition switch may not send the signal to the starter solenoid.
- Neutral Safety Switch: On automatic transmissions, the neutral safety switch prevents the engine from starting unless the transmission is in Park or Neutral. A faulty switch can prevent the starter from engaging.
- Flywheel/Flexplate: Damaged teeth on the flywheel or flexplate can prevent the starter pinion gear from engaging properly.
A comprehensive diagnosis should include checking these related components to ensure that the problem is correctly identified and resolved.
Maintaining Your Starter for Longevity
While starters are wear items, proper maintenance can extend their lifespan:
- Keep Battery Connections Clean: Regularly clean and tighten the battery terminals to ensure good electrical contact.
- Avoid Short Trips: Frequent short trips can put extra strain on the starter, as it has to work harder to start the engine.
- Address Starting Problems Promptly: Don’t ignore starting problems. Addressing them early can prevent further damage to the starter and other components.
The Importance of a Reliable Starting System
A reliable starting system is essential for the smooth operation of your Honda Civic. A properly functioning starter ensures that you can start your car quickly and easily, every time. Neglecting starter problems can lead to inconvenience, frustration, and potentially costly repairs. According to a recent survey by a leading automotive publication, starter-related issues account for a significant percentage of roadside assistance calls. Maintaining your starter and addressing problems promptly can save you time, money, and headaches in the long run.
Ensuring a Smooth Start: Final Thoughts on Your Civic’s Starter
Understanding the honda civic starter location, its function, and potential problems is crucial for any Civic owner. By following the guidance in this article, you can confidently diagnose starter issues, perform basic troubleshooting, and even replace the starter yourself if you’re mechanically inclined. Remember to always prioritize safety and consult your repair manual for specific instructions related to your vehicle model. A well-maintained starting system ensures a reliable and enjoyable driving experience.
Now that you’re equipped with this knowledge, why not inspect your Civic’s starter and ensure everything is in good working order? Share your experiences and any additional tips you might have in the comments below!
