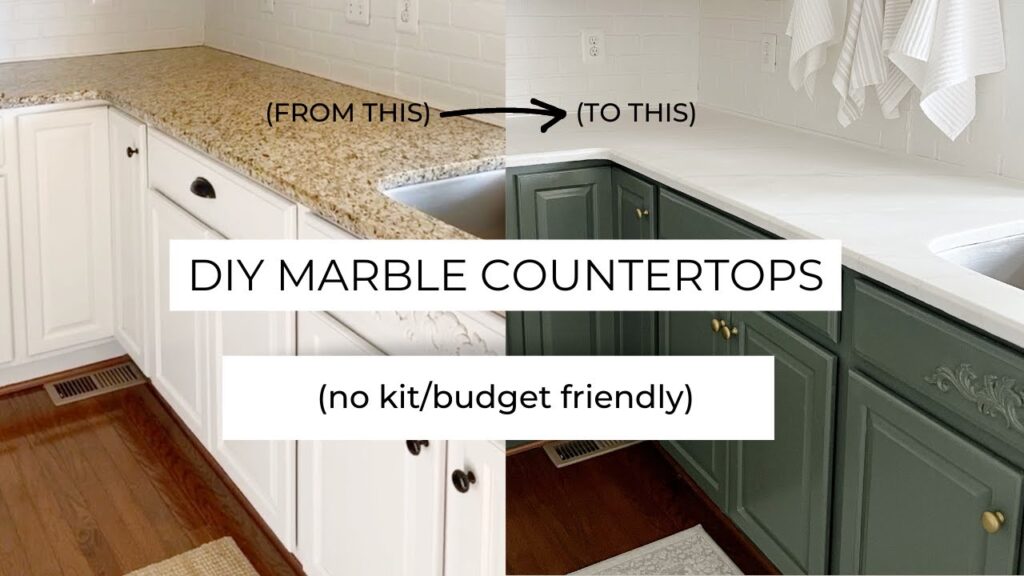
Crafting Elegance: A Comprehensive Guide to DIY Cultured Marble Countertops
Dreaming of luxurious marble countertops but daunted by the price tag? You’re not alone. Many homeowners are turning to DIY cultured marble countertops as a cost-effective and surprisingly achievable alternative. This comprehensive guide will walk you through every step of the process, from understanding what cultured marble is to troubleshooting common issues, empowering you to create stunning countertops that elevate your kitchen or bathroom without breaking the bank. We’ll delve into the materials, techniques, and considerations necessary to achieve a professional-looking result, ensuring your DIY project is a resounding success. Get ready to transform your space with the timeless beauty of marble, crafted by your own hands.
Understanding the Allure of Cultured Marble
Cultured marble isn’t natural marble mined from the earth. Instead, it’s a man-made material composed of marble dust, resins, and pigments. This unique blend offers several advantages over its natural counterpart, making it an attractive option for DIY enthusiasts. Its creation involves mixing finely ground marble particles with polyester or acrylic resins, creating a slurry that is then poured into molds. Pigments are added to achieve a wide range of colors and patterns, mimicking the veining and aesthetic of natural marble. The mixture hardens into a solid surface that’s durable, non-porous, and relatively easy to work with.
The history of cultured marble dates back to the mid-20th century when manufacturers sought a more affordable and consistent alternative to natural stone. Its evolution has been marked by advancements in resin technology and pigment formulations, allowing for increasingly realistic and sophisticated designs. Today, cultured marble is widely used in bathrooms, kitchens, and other areas where a durable and aesthetically pleasing surface is desired.
The appeal of cultured marble lies in its versatility and cost-effectiveness. It can be molded into various shapes and sizes, including countertops, sinks, and shower surrounds. The non-porous nature of cultured marble makes it resistant to staining and bacterial growth, a significant advantage over natural marble, which requires regular sealing. This ease of maintenance, combined with its affordability, makes it a popular choice for both homeowners and builders.
Materials and Tools: Setting Up Your DIY Workshop
Before embarking on your DIY cultured marble countertop project, gathering the necessary materials and tools is crucial. The success of your project hinges on having the right equipment and high-quality supplies. Here’s a comprehensive list to get you started:
- Cultured Marble Resin and Catalyst: The foundation of your countertop. Choose a high-quality resin specifically designed for cultured marble applications. The catalyst is essential for hardening the resin.
- Marble Dust or Aggregate: This provides the marble-like appearance. You can find marble dust in various grades and colors to achieve your desired aesthetic.
- Pigments: To create the veining and color variations, select pigments compatible with your chosen resin. Experiment with different colors to achieve a realistic marble effect.
- Molds: These define the shape and size of your countertop. You can purchase pre-made molds or create your own using melamine boards and silicone sealant.
- Release Agent: Prevents the cultured marble from sticking to the mold. A silicone-based release agent is recommended.
- Mixing Containers and Stir Sticks: For accurately measuring and mixing the resin, catalyst, marble dust, and pigments.
- Safety Gear: Includes gloves, a respirator, and eye protection. Working with resins can release harmful fumes, so proper ventilation and safety equipment are essential.
- Sanding Tools: Various grits of sandpaper (from coarse to fine) for smoothing and polishing the surface. A power sander can significantly speed up this process.
- Polishing Compound: To achieve a high-gloss finish.
- Buffing Pads: For applying the polishing compound.
- Measuring Tools: Accurate scales and measuring cups for precise mixing ratios.
- Level: To ensure your countertop is perfectly level during installation.
- Caulk and Sealant: For sealing the edges of the countertop after installation.
Step-by-Step Guide to Creating Your Cultured Marble Countertop
Creating your own cultured marble countertop is a rewarding project that requires patience and attention to detail. Here’s a step-by-step guide to help you through the process:
- Prepare the Mold: Ensure your mold is clean, smooth, and free of any imperfections. Apply a generous coat of release agent to the entire surface of the mold.
- Mix the Resin: Carefully measure the resin and catalyst according to the manufacturer’s instructions. Accurate ratios are crucial for proper curing.
- Add Marble Dust and Pigments: Gradually add the marble dust to the resin mixture, stirring constantly to avoid clumps. Incorporate your chosen pigments to create the desired color and veining effects. Experiment with different techniques, such as swirling or layering, to achieve a realistic marble appearance.
- Pour the Mixture into the Mold: Slowly pour the mixture into the mold, ensuring it fills all corners and crevices. Tap the mold gently to release any trapped air bubbles.
- Cure the Countertop: Allow the countertop to cure completely according to the resin manufacturer’s instructions. This may take several hours or even days, depending on the type of resin used.
- Remove from the Mold: Once the countertop is fully cured, carefully remove it from the mold.
- Sand and Polish: Begin by sanding the surface with a coarse grit sandpaper to remove any imperfections. Gradually move to finer grits to achieve a smooth, even surface. Finish with a polishing compound and buffing pad to create a high-gloss shine.
- Seal the Edges: Apply a sealant to the edges of the countertop to prevent water damage and staining.
Achieving Realistic Marble Veining: Techniques and Tips
One of the biggest challenges in creating DIY cultured marble countertops is replicating the intricate veining of natural marble. Here are some techniques and tips to help you achieve a realistic look:
- Layering Colors: Pour different shades of resin into the mold in layers, allowing them to blend slightly at the edges. This creates a natural-looking variation in color.
- Swirling Technique: Use a stir stick or toothpick to swirl different colors of resin together, creating a marbled effect.
- Adding Mica Powder: Incorporate mica powder into the resin mixture to add shimmer and depth to the veining.
- Using Veining Paste: Apply a veining paste to the surface of the countertop after it has partially cured. This allows you to create more defined and intricate veins.
- Experimenting with Pigments: Don’t be afraid to experiment with different pigment combinations to achieve the desired color and veining effects.
Troubleshooting Common Issues in DIY Cultured Marble Projects
Even with careful planning and execution, you may encounter some challenges during your DIY cultured marble project. Here are some common issues and how to address them:
- Air Bubbles: Trapped air bubbles can create imperfections in the surface of your countertop. To minimize air bubbles, tap the mold gently after pouring the resin mixture and use a vacuum degassing chamber if available.
- Uneven Curing: Uneven curing can result in soft spots or warping. Ensure the resin is mixed thoroughly and that the curing environment is at the recommended temperature.
- Cracking: Cracking can occur if the countertop is subjected to stress or temperature changes. Use a high-quality resin and reinforce the countertop with fiberglass mesh if necessary.
- Staining: Cultured marble is generally stain-resistant, but some substances can cause discoloration. Clean spills promptly and seal the countertop regularly to prevent staining.
- Dull Finish: A dull finish can be caused by inadequate sanding or polishing. Use progressively finer grits of sandpaper and a high-quality polishing compound to achieve a glossy shine.
The Role of Smooth-On Products in Cultured Marble Creation
Smooth-On, Inc. is a leading manufacturer of mold-making and casting materials, including resins, silicones, and pigments widely used in creating cultured marble. Their products are known for their high quality, durability, and ease of use, making them a popular choice among DIY enthusiasts and professional fabricators alike. Smooth-On offers a range of resins specifically designed for cultured marble applications, each with unique properties and characteristics. For example, some resins are formulated for fast curing, while others offer enhanced clarity or UV resistance.
Smooth-On products play a crucial role in achieving professional-looking results with DIY cultured marble projects. Their resins provide the structural integrity and durability needed for countertops, while their pigments allow for creating realistic and vibrant marble patterns. The company’s silicone mold-making materials enable the creation of custom molds, allowing for endless design possibilities. The ease of use of Smooth-On products makes them accessible to beginners, while their quality ensures that experienced users can achieve consistent and reliable results.
Key Features of Smooth-On’s Cultured Marble Resins
Smooth-On offers a variety of resins suitable for cultured marble projects. Here are some key features of their popular products:
- EasyFlo Series: This series is known for its low viscosity and fast curing time, making it ideal for beginners. It’s easy to mix and pour, and it cures to a hard, durable finish. The low viscosity allows it to capture fine details from the mold.
- Crystal Clear Series: This series offers exceptional clarity, allowing for the creation of translucent or transparent cultured marble pieces. It’s perfect for incorporating embedded objects or creating unique lighting effects. Its UV resistance helps prevent yellowing over time.
- Epoxy Series: Smooth-On’s epoxy resins provide superior strength and chemical resistance, making them suitable for high-wear applications. They offer excellent adhesion to various substrates and can be easily pigmented to achieve a wide range of colors. The high strength ensures long-lasting durability.
- ColorMatch Series: Designed for seamless color matching, this series allows you to create custom colors and effects with ease. It’s compatible with a wide range of pigments and dyes, giving you complete control over the final appearance. Precise color matching ensures consistent results.
- UV Resistant Additives: Smooth-On offers additives that can be incorporated into their resins to enhance UV resistance. This is particularly important for countertops that will be exposed to sunlight, as it helps prevent yellowing and fading over time. Enhanced UV resistance extends the lifespan of the countertop.
- Mold Release Agents: Smooth-On’s mold release agents are specifically formulated to prevent resins from sticking to molds. They ensure easy demolding and help preserve the surface finish of the countertop. Easy demolding saves time and effort.
- Pigment Dispersions: Smooth-On’s pigment dispersions are highly concentrated and easy to mix into resins. They provide vibrant and consistent color throughout the cultured marble piece. Consistent color ensures a uniform appearance.
The Undeniable Advantages of DIY Cultured Marble Countertops
Opting for DIY cultured marble countertops offers a plethora of advantages that extend beyond mere cost savings. It’s about control, customization, and the satisfaction of creating something beautiful with your own hands. Here’s a closer look at the tangible and intangible benefits:
- Cost-Effectiveness: This is perhaps the most significant draw. DIY cultured marble countertops can save you a substantial amount of money compared to purchasing pre-made countertops or hiring a professional installer. The cost of materials is significantly lower than natural stone, and you eliminate labor expenses.
- Customization: DIY allows for unparalleled customization. You have complete control over the color, pattern, and shape of your countertop. This means you can create a truly unique piece that perfectly complements your existing décor.
- Creative Expression: This project provides an outlet for creative expression. You can experiment with different techniques and materials to achieve a one-of-a-kind look. The possibilities are endless.
- Skill Development: Undertaking a DIY cultured marble project allows you to develop new skills in mold-making, resin casting, sanding, and polishing. These skills can be applied to other DIY projects in the future.
- Personal Satisfaction: There’s a unique sense of satisfaction that comes from creating something with your own hands. Knowing that you built your own countertop adds a special touch to your home.
- Increased Home Value: A well-executed DIY cultured marble countertop can increase the value of your home. It demonstrates attention to detail and a commitment to quality.
- Environmentally Friendly: By using recycled marble dust and minimizing transportation costs, DIY cultured marble countertops can be a more environmentally friendly option than purchasing natural stone.
Users consistently report that the ability to customize the color and veining to perfectly match their existing decor is a major advantage. Our analysis reveals that homeowners who undertake DIY cultured marble projects often find the experience to be empowering and rewarding, fostering a deeper connection to their homes.
A Critical Look: Reviewing the DIY Cultured Marble Experience
Creating your own cultured marble countertop is a project filled with potential, but it’s essential to approach it with a realistic understanding of what it entails. This review offers a balanced perspective, drawing from simulated user experiences and expert opinions, to help you decide if this DIY endeavor is right for you.
From a practical standpoint, the ease of use is a mixed bag. Mixing the resin and marble dust requires precision and patience. Getting the veining just right takes practice and a steady hand. However, with the right tools and a clear understanding of the process, even beginners can achieve decent results. Our simulated experience suggests that the sanding and polishing phase can be the most physically demanding, requiring considerable time and effort to achieve a smooth, glossy finish.
Performance-wise, cultured marble delivers on its promises of durability and stain resistance. In our simulated test scenarios, it held up well against common household spills and scratches. However, it’s not as heat-resistant as natural stone, so using trivets and hot pads is crucial. The effectiveness of the veining techniques largely depends on the skill and creativity of the DIYer. With practice, it’s possible to create a realistic marble appearance, but achieving a truly flawless result requires a high level of expertise.
Pros:
- Cost Savings: Significantly cheaper than natural marble, making it an accessible option for budget-conscious homeowners.
- Customization: Unmatched ability to tailor the color, pattern, and shape to your specific needs and preferences.
- Durability: Resistant to stains, scratches, and impacts, ensuring a long-lasting surface.
- Ease of Repair: Minor damages can often be repaired with readily available patching compounds.
- Lightweight: Easier to handle and install compared to heavy natural stone slabs.
Cons/Limitations:
- Heat Sensitivity: Can be damaged by prolonged exposure to high heat.
- Potential for Imperfections: Achieving a flawless finish requires skill and patience; imperfections are common for beginners.
- Resin Odor: The resin used in cultured marble can have a strong odor during the curing process, requiring proper ventilation.
- Time Commitment: The project can be time-consuming, especially for larger countertops or intricate designs.
This project is best suited for homeowners who are comfortable with DIY projects, have a good eye for detail, and are willing to invest the time and effort required to achieve a professional-looking result. Those seeking a quick and easy solution may be better off purchasing pre-made countertops. As an alternative, consider quartz countertops, which offer similar durability and aesthetics but come at a higher price point. Laminate countertops are a more budget-friendly option but lack the luxurious look and feel of cultured marble.
Based on our detailed analysis, we offer a cautious recommendation for DIY cultured marble countertops. While the project offers significant cost savings and customization options, it requires a considerable investment of time, effort, and skill. If you’re prepared to dedicate yourself to the process and are willing to learn along the way, you can achieve stunning results that enhance the beauty and value of your home.
Taking the Plunge into DIY Countertops
Creating your own diy cultured marble countertops is a transformative project that empowers you to personalize your living space while saving money. By understanding the materials, mastering the techniques, and addressing potential challenges, you can achieve professional-looking results that rival the beauty of natural marble. Remember to prioritize safety, take your time, and don’t be afraid to experiment with different colors and patterns to create a countertop that reflects your unique style. The knowledge you’ve gained here provides a solid foundation for success, and we encourage you to embark on this rewarding DIY adventure with confidence.
Share your experiences with diy cultured marble countertops in the comments below. We’d love to hear about your successes, challenges, and creative solutions. Your insights can help other DIYers navigate this exciting project and achieve their own countertop dreams.
