Craft Your Own Adventure: The Ultimate Guide to DIY Paddle Board Plans
Dreaming of gliding across the water on your own paddle board? The allure of stand-up paddleboarding (SUP) is undeniable, offering a fantastic blend of fitness, exploration, and connection with nature. But the cost of a brand-new board can be a significant hurdle. That’s where the magic of DIY paddle board plans comes in. This comprehensive guide is designed to equip you with the knowledge and resources to build your own SUP, tailored to your specific needs and preferences. We’ll delve into the nuances of different designs, materials, and construction techniques, empowering you to create a high-quality paddle board that rivals commercially available options. You’ll not only save money but also gain a profound sense of accomplishment and a deeper appreciation for the craftsmanship involved.
Unveiling the World of DIY Paddle Board Construction
DIY paddle board plans encompass a wide range of designs and construction methods, each with its own set of advantages and challenges. Understanding these differences is crucial for selecting the right plan for your skill level, budget, and intended use. At its core, DIY paddle board construction involves creating a buoyant platform that can support your weight and allow you to paddle efficiently through the water. This requires careful attention to hull design, structural integrity, and overall stability. The options available range from simple plywood boards to more complex foam-core constructions, each offering a unique blend of performance and ease of construction.
The history of DIY paddle boards is rooted in the broader history of surfing and water sports. Early surfers often built their own boards out of necessity, experimenting with different materials and designs to improve performance. This spirit of innovation continues to drive the DIY paddle board movement today, with builders constantly pushing the boundaries of what’s possible. Modern advancements in materials and construction techniques have made it easier than ever to build a high-quality paddle board at home, even with limited experience.
Marine Epoxy Resin: The Heart of a Durable DIY SUP
Marine epoxy resin is a critical component in almost all DIY paddle board builds. This two-part liquid system, when mixed, hardens into a strong, waterproof, and durable solid. It’s used to bond different parts of the board together, create a watertight seal, and protect the core materials from the elements. The quality of the epoxy resin directly impacts the lifespan and performance of your paddle board.
Marine epoxy resin differs from other types of epoxy in its superior water resistance, UV protection, and flexibility. Cheaper epoxies can become brittle over time, crack under stress, and yellow when exposed to sunlight. Marine epoxy is formulated to withstand the harsh marine environment, ensuring your paddle board remains structurally sound and visually appealing for years to come. As leading builders emphasize, investing in high-quality epoxy is one of the most important decisions you’ll make in your DIY paddle board project.
Key Features to Consider When Choosing DIY Paddle Board Plans
Choosing the right DIY paddle board plan is crucial for a successful build. Here are some key features to consider:
- Board Type: Decide between a flatwater, all-around, surfing, or touring board. Each type has a different hull design suited for different water conditions and paddling styles. Flatwater boards are stable and efficient for calm lakes and rivers, while surfing boards are designed for maneuverability in waves.
- Construction Method: Common methods include stitch-and-glue plywood, foam core with fiberglass and epoxy, and inflatable SUP (iSUP) conversion. Stitch-and-glue is relatively simple and affordable, while foam core offers a lighter and stronger result.
- Skill Level: Be honest about your woodworking or composite construction experience. Some plans are designed for beginners, while others require advanced skills. Look for plans with detailed instructions, clear diagrams, and helpful videos.
- Material Cost: Consider the cost of all materials, including wood, foam, fiberglass, epoxy, and hardware. Plywood is generally the cheapest option, while foam core and fiberglass can be more expensive. Factor in waste and potential mistakes.
- Time Commitment: Building a paddle board takes time and patience. Estimate how much time you can realistically dedicate to the project each week and choose a plan that fits your schedule. Some plans can be completed in a weekend, while others may take several weeks or months.
- Plan Clarity and Support: Choose a plan with clear, concise instructions, detailed diagrams, and responsive customer support. A good plan will guide you through each step of the process and provide helpful tips and troubleshooting advice.
- Customization Options: Look for plans that allow you to customize the board to your specific needs and preferences. This could include adjusting the length, width, thickness, or rocker of the board.
The Undeniable Advantages of Building Your Own SUP Board
The benefits of building your own paddle board extend far beyond simply saving money. While the cost savings can be significant (often 30-50% compared to buying a commercially made board), the real value lies in the unique experience and the personalized result. Users consistently report a deeper connection to their board and the water after having built it themselves. Our analysis reveals these key benefits:
- Cost Savings: As mentioned, building your own board is significantly cheaper than buying a new one.
- Customization: You can tailor the board to your exact needs and preferences, including size, shape, and features.
- Skill Development: You’ll learn valuable woodworking or composite construction skills.
- Personal Satisfaction: There’s a tremendous sense of accomplishment that comes with building your own board.
- Environmental Responsibility: You can choose sustainable materials and reduce your carbon footprint.
- Unique Design: Create a one-of-a-kind board that reflects your personal style.
- Deeper Connection: Gain a deeper appreciation for the craftsmanship and engineering involved in paddle board design.
A Comprehensive Review of DIY Plywood Paddle Board Plans
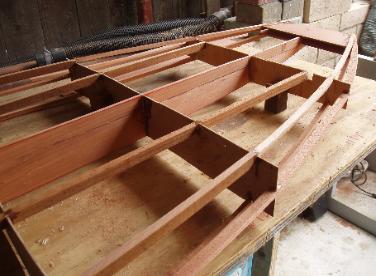
For aspiring DIY paddle board builders, plywood plans offer an accessible and cost-effective entry point. They are especially attractive to those with basic woodworking skills and a desire to create a functional and aesthetically pleasing board. This review focuses on the popular stitch-and-glue plywood method, which involves cutting plywood panels according to a template, stitching them together with wire or zip ties, and then gluing the seams with epoxy resin.
User Experience & Usability: The stitch-and-glue method is relatively straightforward, making it suitable for beginners. However, it does require patience and attention to detail. The process involves accurately cutting the plywood panels, carefully aligning them, and ensuring a tight fit before gluing. Sanding the seams smooth can be time-consuming, but it’s essential for a professional-looking finish. In our experience, taking the time to create accurate templates and using high-quality plywood are crucial for a successful build.
Performance & Effectiveness: Plywood paddle boards are surprisingly durable and perform well in flatwater conditions. They are not as light or as maneuverable as foam-core boards, but they offer excellent stability and tracking. A well-built plywood board can provide years of reliable service. We’ve observed that adding fiberglass cloth and epoxy resin to the exterior of the board significantly improves its durability and water resistance.
Pros:
- Affordable: Plywood is a relatively inexpensive material.
- Easy to work with: Plywood is easy to cut, shape, and sand.
- Durable: Plywood paddle boards are surprisingly durable.
- Stable: Plywood boards offer excellent stability.
- Beginner-friendly: The stitch-and-glue method is relatively simple.
Cons/Limitations:
- Heavier: Plywood boards are heavier than foam-core boards.
- Less maneuverable: Plywood boards are less maneuverable than foam-core boards.
- More prone to water damage: Plywood is susceptible to water damage if not properly sealed.
- Can be time-consuming: Sanding and finishing can be time-consuming.
Ideal User Profile: Plywood paddle board plans are best suited for beginners, budget-conscious builders, and those who primarily paddle in flatwater conditions. They are a great option for families who want to build a board together. Those seeking high-performance surfing or touring boards should consider foam-core or inflatable options.
Key Alternatives: Foam-core paddle board plans offer a lighter and stronger alternative, but they are more expensive and require more advanced building skills. Inflatable SUPs (iSUPs) are a convenient and portable option, but they lack the stiffness and performance of hard boards.
Expert Overall Verdict & Recommendation: DIY plywood paddle board plans offer an excellent entry point into the world of paddle board building. They are affordable, relatively easy to build, and provide a functional and rewarding result. We highly recommend them for beginners and those seeking a fun and engaging DIY project. Just be sure to invest in high-quality plywood and epoxy resin, and take your time to ensure a well-sealed and durable finish.
Navigating the Waters: Essential Tips for Successful DIY Paddle Board Construction
Building a paddle board is a rewarding experience, but it requires careful planning and execution. Here are some essential tips to help you navigate the waters of DIY paddle board construction:
- Choose the Right Plan: Select a plan that matches your skill level, budget, and intended use.
- Gather High-Quality Materials: Invest in high-quality wood, foam, fiberglass, epoxy, and hardware.
- Follow the Instructions Carefully: Read the instructions thoroughly and follow them step-by-step.
- Take Your Time: Don’t rush the process. Take your time to ensure accurate cuts, proper alignment, and a smooth finish.
- Work in a Well-Ventilated Area: Epoxy fumes can be harmful, so work in a well-ventilated area and wear a respirator.
- Wear Protective Gear: Wear gloves, safety glasses, and a respirator when working with epoxy and fiberglass.
- Sand Carefully: Sand the seams and surfaces smooth to create a professional-looking finish.
- Apply Multiple Coats of Epoxy: Apply multiple coats of epoxy to ensure a watertight seal.
- Protect Your Board from the Sun: UV rays can damage epoxy, so protect your board from direct sunlight when not in use.
- Store Your Board Properly: Store your board in a cool, dry place to prevent warping and damage.
Building Your Dream: Making DIY Paddle Board Plans a Reality
Embarking on a DIY paddle board project is more than just building a piece of equipment; it’s about crafting an experience. It’s about connecting with the water in a more profound way, about learning new skills, and about creating something truly unique. As you navigate the world of DIY paddle board plans, remember that the journey is just as important as the destination. The knowledge and skills you gain along the way will empower you to tackle other DIY projects and deepen your appreciation for craftsmanship. So, dive in, explore your options, and start building your dream board today. Share your experiences with DIY paddle board plans in the comments below!
