Achieving the Perfect Grey: A Comprehensive Guide to Staining Wood Floors
Grey wood floors have become a staple in modern interior design, offering a versatile and sophisticated aesthetic that complements a wide range of styles. Whether you’re aiming for a rustic farmhouse vibe, a sleek contemporary look, or something in between, the right grey wood floors stain can transform your space. This comprehensive guide provides everything you need to know about achieving the perfect grey wood floor, from understanding the nuances of grey stains to mastering the application process and ensuring long-lasting beauty.
This article dives deep into the world of grey wood floor stains, offering insights gathered from years of experience working with wood and finishes. We’ll explore the different types of grey stains, the best wood species for achieving a desirable grey tone, and the essential steps for preparing your floors for staining. Moreover, we’ll discuss common pitfalls and how to avoid them, ensuring a professional-looking result that enhances the value and appeal of your home. Whether you’re a seasoned DIYer or a homeowner embarking on your first flooring project, this guide equips you with the knowledge and confidence to create stunning grey wood floors.
Understanding the Allure of Grey Wood Floors
Grey wood floors have surged in popularity, and for good reason. They offer a unique blend of neutrality and character, providing a sophisticated backdrop for a variety of décor styles. Unlike warmer wood tones that can sometimes feel dated, grey floors offer a fresh and contemporary feel. But the appeal goes beyond mere aesthetics. Grey floors are incredibly versatile, working well in both large, open spaces and smaller, more intimate rooms. They also have a knack for hiding dust and imperfections, making them a practical choice for busy households.
The beauty of grey lies in its spectrum. From light, airy greys that brighten a room to deep, charcoal hues that exude drama, there’s a grey for every taste and space. The specific shade of grey can significantly impact the overall mood of a room. Lighter greys tend to create a more spacious and inviting atmosphere, while darker greys add a touch of sophistication and elegance. Understanding the nuances of grey and how it interacts with light and other colors is crucial for achieving the desired effect.
Exploring Different Types of Grey Wood Floor Stains
The world of wood stains is vast and varied, with countless options available for achieving the perfect grey. Understanding the different types of stains and their unique properties is essential for making an informed decision.
- Water-Based Stains: These stains are known for their low odor and easy cleanup. They tend to produce a more subtle, even color, making them a good choice for achieving a light grey tone. However, they may raise the grain of the wood, requiring additional sanding.
- Oil-Based Stains: Oil-based stains penetrate the wood more deeply, resulting in a richer, more vibrant color. They also tend to enhance the natural grain of the wood. However, they have a stronger odor and require more involved cleanup.
- Gel Stains: Gel stains are thicker than other types of stains, making them ideal for use on woods that are prone to blotching. They sit on the surface of the wood rather than penetrating deeply, resulting in a more consistent color.
- Reactive Stains: These stains react chemically with the tannins in the wood to create a unique, aged grey look. The color produced by reactive stains can vary depending on the species of wood and the concentration of tannins. Reactive stains are a favorite amongst those seeking a truly unique and organic grey tone.
The choice of stain will depend on the desired look, the type of wood, and your personal preferences. It’s always a good idea to test different stains on a small, inconspicuous area of the floor before committing to the entire project.
Selecting the Right Wood Species for Grey Staining
Not all wood species are created equal when it comes to staining them grey. Some woods readily absorb stain and showcase the grey hue beautifully, while others may resist the stain or produce an undesirable color cast. Choosing the right wood species is just as important as selecting the right stain.
- White Oak: White oak is a popular choice for grey staining due to its neutral undertones and open grain. It readily absorbs stain and produces a consistent, even color.
- Red Oak: Red oak has pinkish undertones that can sometimes interfere with the grey stain, resulting in a warmer, less desirable tone. However, with the right stain and technique, red oak can still be successfully stained grey.
- Maple: Maple is a dense, closed-grain wood that can be difficult to stain evenly. It is prone to blotching, so careful preparation and the use of a gel stain are essential.
- Pine: Pine is a softwood that readily absorbs stain, but it can also be prone to blotching. Using a wood conditioner before staining can help to prevent this.
- Hardwoods with Prominent Grain Patterns (e.g., Hickory, Ash): These woods can create a very dynamic and interesting grey floor, as the stain highlights the grain.
Consider the existing color and grain pattern of your wood floors when selecting a grey stain. If your floors have warm undertones, you may need to choose a cooler-toned grey stain to counteract the warmth. If your floors have a prominent grain pattern, you may want to choose a stain that enhances the grain rather than obscures it.
Preparing Your Wood Floors for Grey Stain: A Crucial Step
Proper preparation is the key to achieving a flawless grey wood floor. Rushing this step can lead to uneven staining, blotching, and other undesirable results. Take the time to thoroughly prepare your floors, and you’ll be rewarded with a beautiful, long-lasting finish.
- Remove Existing Finish: If your floors are already finished, you’ll need to remove the existing finish by sanding. Use a drum sander for large areas and an edge sander for corners and edges. Start with a coarse grit sandpaper and gradually work your way up to a fine grit.
- Repair Any Damage: Fill any holes, cracks, or gouges with wood filler. Allow the wood filler to dry completely and then sand it smooth.
- Sand the Floors: Sand the entire floor surface to create a smooth, even surface for the stain to adhere to. Start with a medium-grit sandpaper and gradually work your way up to a fine-grit sandpaper.
- Clean the Floors: Thoroughly vacuum the floors to remove all dust and debris. Then, wipe the floors down with a tack cloth to remove any remaining dust.
- Water Pop the Grain (Optional): Water popping involves lightly dampening the wood to raise the grain. This allows the stain to penetrate more deeply, resulting in a richer, more vibrant color. This is particularly helpful on dense woods like maple.
- Apply Wood Conditioner (Optional): Wood conditioner helps to prevent blotching, especially on softwoods like pine and maple. Apply the wood conditioner according to the manufacturer’s instructions.
After sanding, always ensure to remove all sanding dust. Vacuuming is not enough. Use a damp cloth to pick up the residual dust, and allow the floor to dry completely before staining.
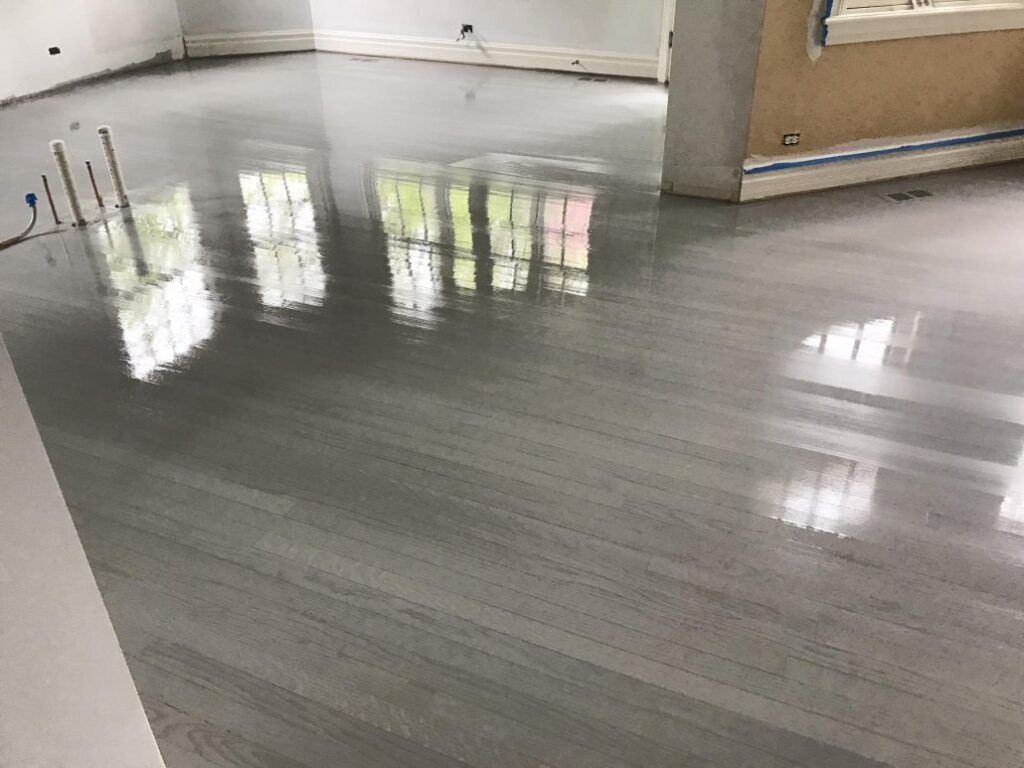
Mastering the Grey Wood Floors Stain Application Process
With your floors properly prepared, it’s time to apply the grey stain. This step requires patience, attention to detail, and a steady hand. Follow these tips for a professional-looking result:
- Choose the Right Applicator: Use a high-quality brush, foam pad, or rag to apply the stain. The choice of applicator will depend on the type of stain and the desired look.
- Apply the Stain Evenly: Apply the stain in long, even strokes, following the direction of the wood grain. Avoid applying too much stain at once, as this can lead to uneven coloring.
- Wipe Off Excess Stain: After a few minutes, wipe off the excess stain with a clean rag. This will help to prevent the stain from drying too dark or blotchy.
- Allow the Stain to Dry Completely: Allow the stain to dry completely according to the manufacturer’s instructions. This may take several hours or even overnight.
- Apply a Second Coat (Optional): If you want a darker, more intense grey color, you can apply a second coat of stain. Allow the first coat to dry completely before applying the second coat.
When applying stain, work in small sections to maintain a wet edge. This helps to prevent lap marks and ensures a more even finish.
Sealing and Protecting Your Grey Wood Floors
Once the stain has dried completely, it’s time to seal and protect your grey wood floors. This will help to prevent wear and tear, protect the stain from fading, and enhance the overall beauty of your floors.
- Choose the Right Sealer: Select a high-quality polyurethane or water-based finish that is designed for use on wood floors. Consider the sheen level you desire. Matte finishes tend to hide imperfections better, while glossy finishes offer a more dramatic look.
- Apply the Sealer Evenly: Apply the sealer in thin, even coats, following the manufacturer’s instructions. Avoid applying too much sealer at once, as this can lead to drips and runs.
- Allow the Sealer to Dry Completely: Allow the sealer to dry completely between coats. This may take several hours or even overnight.
- Sand Between Coats (Optional): Lightly sand the floor between coats of sealer to create a smooth, even surface. Use a fine-grit sandpaper and be careful not to sand through the sealer.
- Apply Multiple Coats: Apply at least two coats of sealer for adequate protection. For high-traffic areas, consider applying three or even four coats.
Always use a high-quality applicator for applying sealer. A good brush or roller will help to ensure a smooth, even finish.
Maintaining the Beauty of Your Grey Wood Floors
With proper care and maintenance, your grey wood floors will retain their beauty for years to come. Follow these tips to keep your floors looking their best:
- Sweep or Vacuum Regularly: Sweep or vacuum your floors regularly to remove dust and debris.
- Clean Spills Immediately: Clean up spills immediately to prevent staining.
- Use a Damp Mop: Use a damp mop to clean your floors as needed. Avoid using excessive amounts of water, as this can damage the wood.
- Use a Wood Floor Cleaner: Use a wood floor cleaner that is specifically designed for use on wood floors. Avoid using harsh chemicals or abrasive cleaners.
- Protect Your Floors: Use rugs and mats in high-traffic areas to protect your floors from wear and tear.
- Avoid Scratches: Place felt pads under furniture legs to prevent scratches.
The Advantages of Choosing Grey Wood Floors Stain
Grey wood floors offer a multitude of advantages, making them a popular choice for homeowners and designers alike. Beyond their aesthetic appeal, grey floors provide practical benefits that contribute to a comfortable and stylish living space. Here’s a closer look at the advantages:
- Versatility: Grey is a neutral color that complements a wide range of décor styles, from modern and minimalist to rustic and traditional.
- Sophistication: Grey floors add a touch of sophistication and elegance to any room.
- Conceals Dust and Imperfections: Grey floors are excellent at hiding dust, dirt, and minor scratches, making them a practical choice for busy households.
- Creates a Calming Atmosphere: Grey is a calming color that can help to create a relaxing and inviting atmosphere.
- Increases Home Value: Grey wood floors are a desirable feature that can increase the value of your home.
- Brightens a Room: Lighter shades of grey can brighten up a room and make it feel more spacious.
- Highlights Décor: Grey floors provide a neutral backdrop that allows your furniture and décor to stand out.
A Lasting Impression
Achieving the perfect grey wood floors stain requires careful planning, meticulous preparation, and a touch of artistry. By understanding the nuances of grey stains, selecting the right wood species, mastering the application process, and providing ongoing care, you can create a stunning and durable floor that enhances the beauty and value of your home. The versatility and timeless appeal of grey wood floors make them a worthwhile investment that you’ll enjoy for years to come. For those seeking an even deeper dive, our team of flooring experts offers personalized consultations to guide you through every step of the process.
