Ultimate Guide: How to Effectively Cover Up Crawl Space Vents
Are you struggling with drafts, moisture, or unwanted pests entering your home through your crawl space vents? You’re not alone. Many homeowners face similar challenges and seek effective solutions. This comprehensive guide provides expert advice on how to cover up crawl space vents, offering practical methods to improve energy efficiency, prevent moisture buildup, and safeguard your home’s structural integrity. We’ll explore various techniques, materials, and best practices, ensuring you have the knowledge to make informed decisions and achieve long-lasting results. Whether you’re looking for a temporary fix or a permanent solution, this guide will equip you with the tools and understanding needed to effectively address your crawl space vent issues.
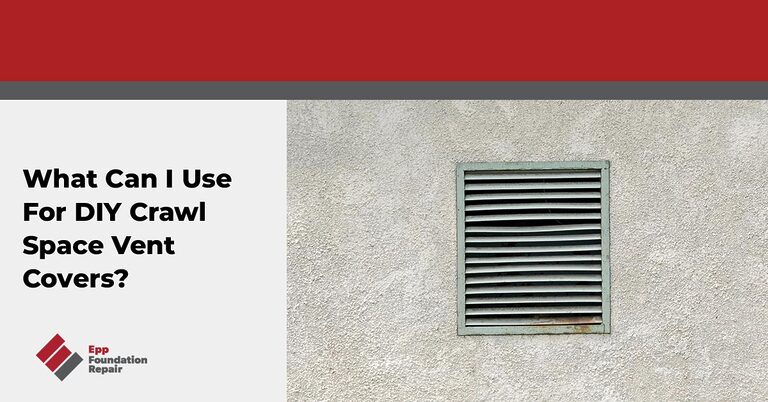
Understanding Crawl Space Ventilation and Its Purpose
Traditionally, crawl spaces were vented to allow air circulation, with the intention of preventing moisture accumulation and wood rot. However, modern building science has revealed that venting can often do more harm than good, particularly in humid climates. While ventilation can help dry out a wet crawl space *if* the outside air is drier than the air *inside* the crawl space, this is rarely the case. In fact, it’s more common for humid outside air to enter the crawl space, condense on cool surfaces, and *increase* moisture levels.
The original reasoning behind crawl space vents was sound, but the execution often falls short due to varying climate conditions and the lack of proper air sealing and insulation. Understanding the purpose of ventilation – and its potential drawbacks – is the first step in determining the best course of action for your specific situation.
Why You Might Need to Cover Up Crawl Space Vents
Several compelling reasons exist for covering crawl space vents, including:
- Moisture Control: Preventing humid air from entering the crawl space reduces the risk of condensation, mold growth, and wood rot.
- Energy Efficiency: Sealing vents minimizes drafts and heat loss, lowering energy bills and improving home comfort.
- Pest Prevention: Blocking access points for rodents, insects, and other pests helps maintain a healthier and more sanitary environment.
- Improved Air Quality: Reducing moisture and pest activity minimizes allergens and odors that can infiltrate your living space.
- Protection from Extreme Weather: Covering vents shields the crawl space from flooding, freezing temperatures, and high winds.
If you’re experiencing any of these issues, covering your crawl space vents is a worthwhile consideration.
Methods for Covering Up Crawl Space Vents: A Detailed Overview
Several methods exist for covering crawl space vents, each with its own advantages and disadvantages. The best approach depends on your budget, climate, and long-term goals.
Temporary Vent Covers
Temporary vent covers are a cost-effective solution for short-term needs or for testing the effectiveness of vent sealing before committing to a permanent solution. These covers are typically made of plastic or foam and can be easily installed and removed.
Pros:
- Inexpensive
- Easy to install and remove
- Suitable for temporary fixes
Cons:
- Not as durable as permanent solutions
- May not provide a complete seal
- Can be easily damaged by weather or pests
Permanent Vent Covers
Permanent vent covers offer a more robust and long-lasting solution. These covers are typically made of metal or durable plastic and are designed to withstand harsh weather conditions and pest damage. They often involve sealing the vent with caulk or expanding foam for an airtight barrier.
Pros:
- Durable and long-lasting
- Provides a more complete seal
- Resistant to weather and pests
Cons:
- More expensive than temporary covers
- Requires more effort to install
- May require professional assistance
Sealing Vents with Expanding Foam or Caulk
This method involves using expanding foam or caulk to completely seal the vents. This is often used in conjunction with permanent vent covers to create an airtight barrier. While effective, it’s important to choose the right type of sealant and apply it properly to prevent air leaks.
Pros:
- Creates an airtight seal
- Relatively inexpensive
- Can be used with or without vent covers
Cons:
- Can be messy to apply
- Requires careful application to avoid gaps
- May not be suitable for all vent types
Crawl Space Encapsulation
Crawl space encapsulation is a comprehensive solution that involves sealing the entire crawl space with a vapor barrier, insulating the walls, and sealing the vents. This creates a conditioned environment that is protected from moisture, pests, and temperature fluctuations. While more expensive than other methods, encapsulation offers the most complete and long-lasting protection.
Pros:
- Provides the most complete protection
- Creates a conditioned environment
- Improves energy efficiency and air quality
Cons:
- Most expensive option
- Requires professional installation
- May not be necessary for all crawl spaces
Step-by-Step Guide: Covering Crawl Space Vents with Permanent Covers
This section provides a detailed guide on how to install permanent vent covers, a popular and effective method for sealing crawl space vents.
Materials You’ll Need:
- Permanent vent covers (sized to fit your vents)
- Caulk or expanding foam
- Utility knife
- Measuring tape
- Safety glasses
- Gloves
- Brush or cloth for cleaning
Step 1: Prepare the Vents
Thoroughly clean the area around the vent openings. Remove any dirt, debris, loose paint, or old sealant. Use a brush or cloth to ensure a clean surface for proper adhesion of the caulk or expanding foam. This step is crucial for creating a strong and airtight seal.
Step 2: Measure the Vents
Accurately measure the dimensions of each vent opening. This will ensure you purchase vent covers that are the correct size. It’s better to have covers that are slightly larger than the opening, as you can always trim them down if needed.
Step 3: Apply Caulk or Expanding Foam
Apply a generous bead of caulk or expanding foam around the perimeter of the vent opening. Be sure to apply the sealant evenly and consistently to create a complete barrier. If using expanding foam, be careful not to over-apply, as it can expand excessively and make a mess.
Step 4: Install the Vent Covers
Carefully position the vent covers over the openings, pressing them firmly into the caulk or expanding foam. Ensure that the covers are properly aligned and that there are no gaps or openings around the edges. Hold the covers in place for a few minutes to allow the sealant to begin to set.
Step 5: Trim Excess Material
If necessary, use a utility knife to trim any excess material from the vent covers. This will create a clean and professional finish. Be careful not to damage the vent covers or the surrounding area.
Step 6: Allow to Cure
Allow the caulk or expanding foam to fully cure according to the manufacturer’s instructions. This may take several hours or even a full day. Avoid disturbing the vent covers during the curing process to ensure a strong and airtight seal.
Step 7: Inspect the Seal
Once the sealant has fully cured, carefully inspect the seal around each vent cover. Look for any gaps or openings that may allow air or moisture to enter the crawl space. If you find any leaks, apply additional caulk or expanding foam to seal them.
The Crucial Role of Vapor Barriers and Insulation
While covering crawl space vents is an important step, it’s often not enough to completely address moisture problems. Installing a vapor barrier and insulating the crawl space walls are also crucial for creating a dry and energy-efficient environment.
A vapor barrier is a plastic or foil sheet that is installed over the dirt floor of the crawl space. It prevents moisture from evaporating from the ground and entering the air. The vapor barrier should be sealed to the walls and around any pipes or other penetrations to create a complete barrier.
Insulating the crawl space walls helps to regulate the temperature and prevent condensation. Rigid foam insulation is a popular choice because it is durable, water-resistant, and easy to install. The insulation should be sealed to the walls and to the vapor barrier to create a continuous thermal barrier.
Why Professional Crawl Space Encapsulation is Often the Best Choice
While DIY methods for covering crawl space vents can be effective, professional crawl space encapsulation offers a more comprehensive and reliable solution. Encapsulation involves sealing the entire crawl space, including the vents, walls, and floor, with a vapor barrier and insulation. This creates a conditioned environment that is protected from moisture, pests, and temperature fluctuations.
Professional encapsulation offers several advantages:
- Expert Installation: Professionals have the experience and expertise to properly install the vapor barrier and insulation, ensuring a complete and airtight seal.
- Customized Solutions: Professionals can assess your specific crawl space needs and recommend the best encapsulation system for your home.
- Long-Term Protection: Encapsulation provides long-lasting protection against moisture, pests, and temperature fluctuations, improving your home’s energy efficiency and air quality.
- Warranty: Many professional encapsulation services offer warranties on their work, providing peace of mind and protection against future problems.
While encapsulation is a more significant investment than DIY methods, it can provide long-term benefits that outweigh the cost.
Assessing the Costs: DIY vs. Professional Solutions
The cost of covering crawl space vents can vary widely depending on the method you choose and whether you opt for a DIY or professional solution. Temporary vent covers are the least expensive option, while crawl space encapsulation is the most expensive. Here’s a general cost breakdown:
- Temporary Vent Covers: $5-$15 per vent
- Permanent Vent Covers: $20-$50 per vent
- Sealing Vents with Expanding Foam or Caulk: $10-$30 per vent
- Crawl Space Encapsulation: $3,000-$10,000+ (depending on the size and complexity of the crawl space)
DIY solutions can save you money on labor costs, but they require time, effort, and expertise. Professional solutions are more expensive, but they offer the peace of mind of knowing that the job is done correctly and that you have a warranty to protect your investment.
Maintaining Your Covered Crawl Space Vents
Once you’ve covered your crawl space vents, it’s important to maintain them to ensure they continue to provide effective protection. Here are some maintenance tips:
- Inspect the vents regularly: Check for any signs of damage, such as cracks, holes, or loose seals.
- Reseal as needed: If you find any leaks, apply additional caulk or expanding foam to seal them.
- Clean the vents: Remove any dirt, debris, or cobwebs that may accumulate on the vents.
- Monitor moisture levels: Use a moisture meter to monitor the humidity levels in your crawl space. If the humidity is too high, consider installing a dehumidifier.
Expert Advice: The Best Approach to Crawl Space Vent Coverage
Choosing the right method for covering crawl space vents depends on your specific needs and circumstances. If you’re looking for a temporary fix or have a limited budget, temporary vent covers may be a suitable option. However, if you want a long-lasting and reliable solution, permanent vent covers or crawl space encapsulation are the better choices.
In our experience, crawl space encapsulation offers the most complete and effective protection against moisture, pests, and temperature fluctuations. While it’s a more significant investment, the long-term benefits often outweigh the cost. Leading experts in building science increasingly recommend encapsulation as the gold standard for crawl space management.
Taking Control of Your Crawl Space Environment
Effectively addressing crawl space ventilation is key to a healthy, energy-efficient home. By understanding the pros and cons of different methods and choosing the right approach for your specific needs, you can create a crawl space environment that protects your home from moisture, pests, and temperature fluctuations. Remember to prioritize proper sealing, insulation, and ongoing maintenance for long-lasting results. If you are unsure about how to cover up crawl space vents, consulting with a professional can ensure the job is done right. Share your experiences with crawl space solutions in the comments below – let’s learn from each other!
